 Gernene
Microsoft Teams: How to Create and Upload an App
June 6, 2019
Building apps for Microsoft Teams can feel pretty tricky. I've assembled this guide to help developers get up and running.
This piece was originally written for Halp. Halp builds Slack-first ticketing tools for support teams and shares tips and tricks on its blog.
About two weeks ago, I started my engineering internship with Halp. We’re building a Halp integration for Microsoft Teams. With Teams’s rapid growth, Microsoft’s multitude of services, and boatloads of documentation, uploading our custom Halp app to Teams became a convoluted process.

There are multiple ways to create custom apps and multiple ways to create bots for said apps - each with their own advantages and drawbacks.
I’ve assembled the following guide based on my own initial process for app creation and uploading. This approach combines the use of Teams’s App Studio and sideloading to maximize available functionality and simplicity.
But what is sideloading? What is App Studio?
Sideloading is a fancy term used to describe uploading a custom app to Teams through Store (rather than App Studio). In contrast, App Studio is the MS Teams app that helps developers create and configure apps within the Teams interface. I’ll explain both in more detail throughout the rest of this guide…
Which, hopefully, will make you pull out less hair while screaming at the screen.
Quick Notes
This guide assumes you’ve already coded an app and set up some sort of domain for your app. If you haven’t, you can take a look at some of Microsoft’s sample apps - just remember to configure any necessary environment variables.
Creating an App
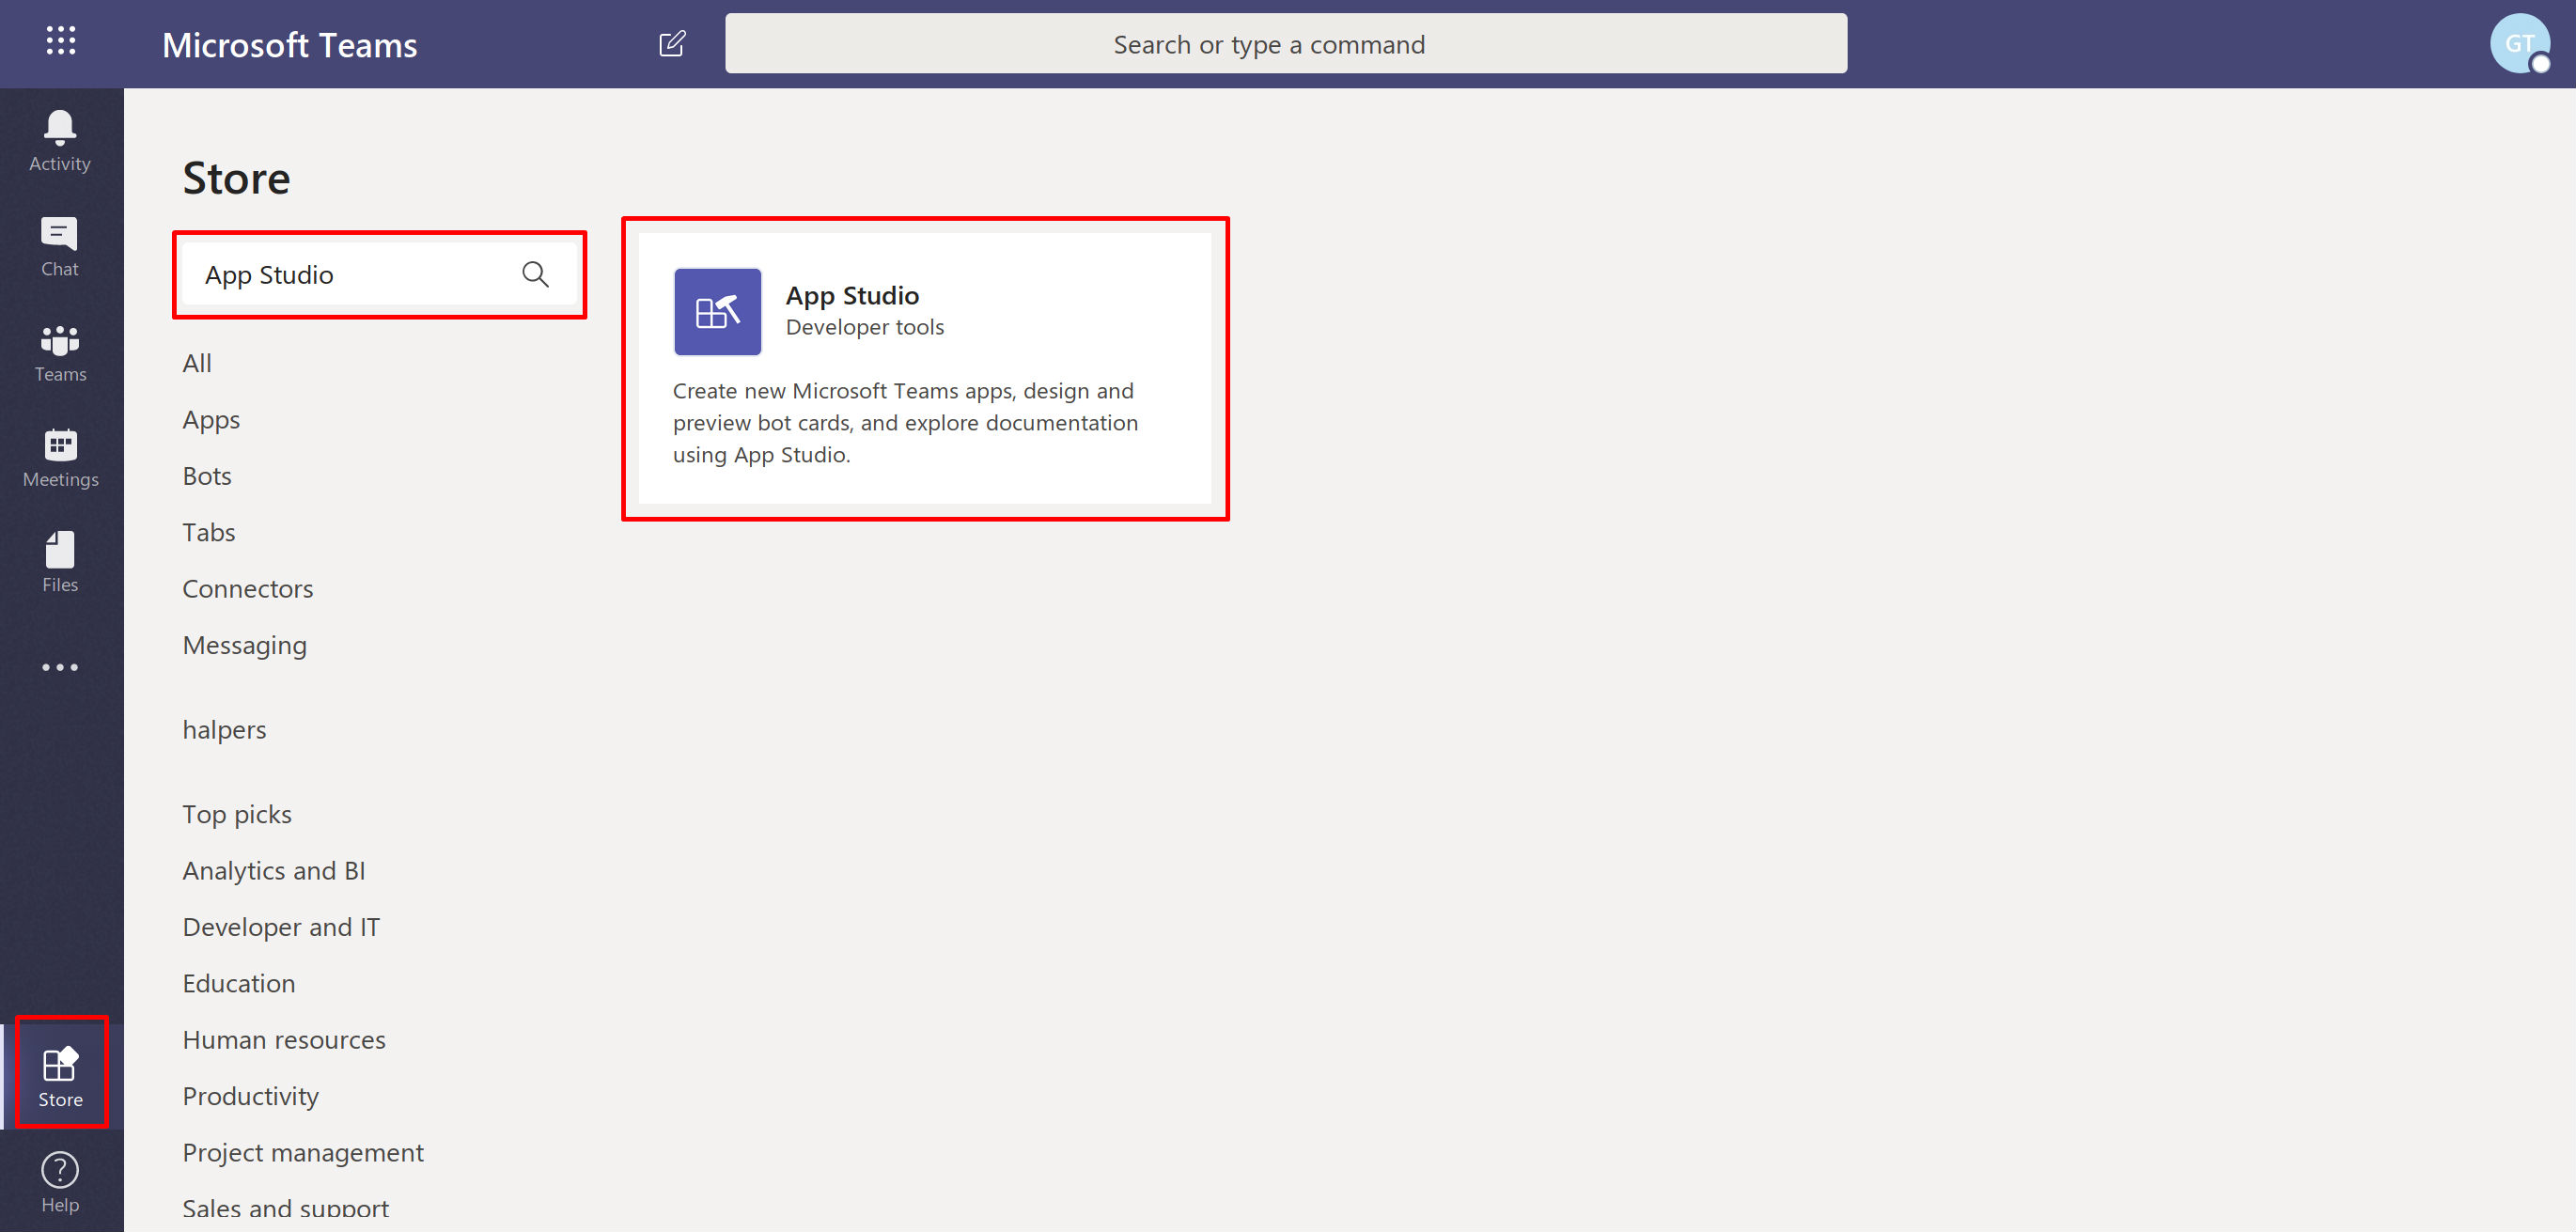
Install App Studio to your Team via the Store App Studio is a Teams app that helps developers set up bots and edit their app’s manifest.json file from within Teams itself.
Locate the store app near the bottom of the left nav bar, search for “App Studio”, and install.
Create a new app
Once installed, you can access App Studio via the ellipsis icon on the left nav bar.

Select the “Manifest editor” tab and then the “Create a new app” button.
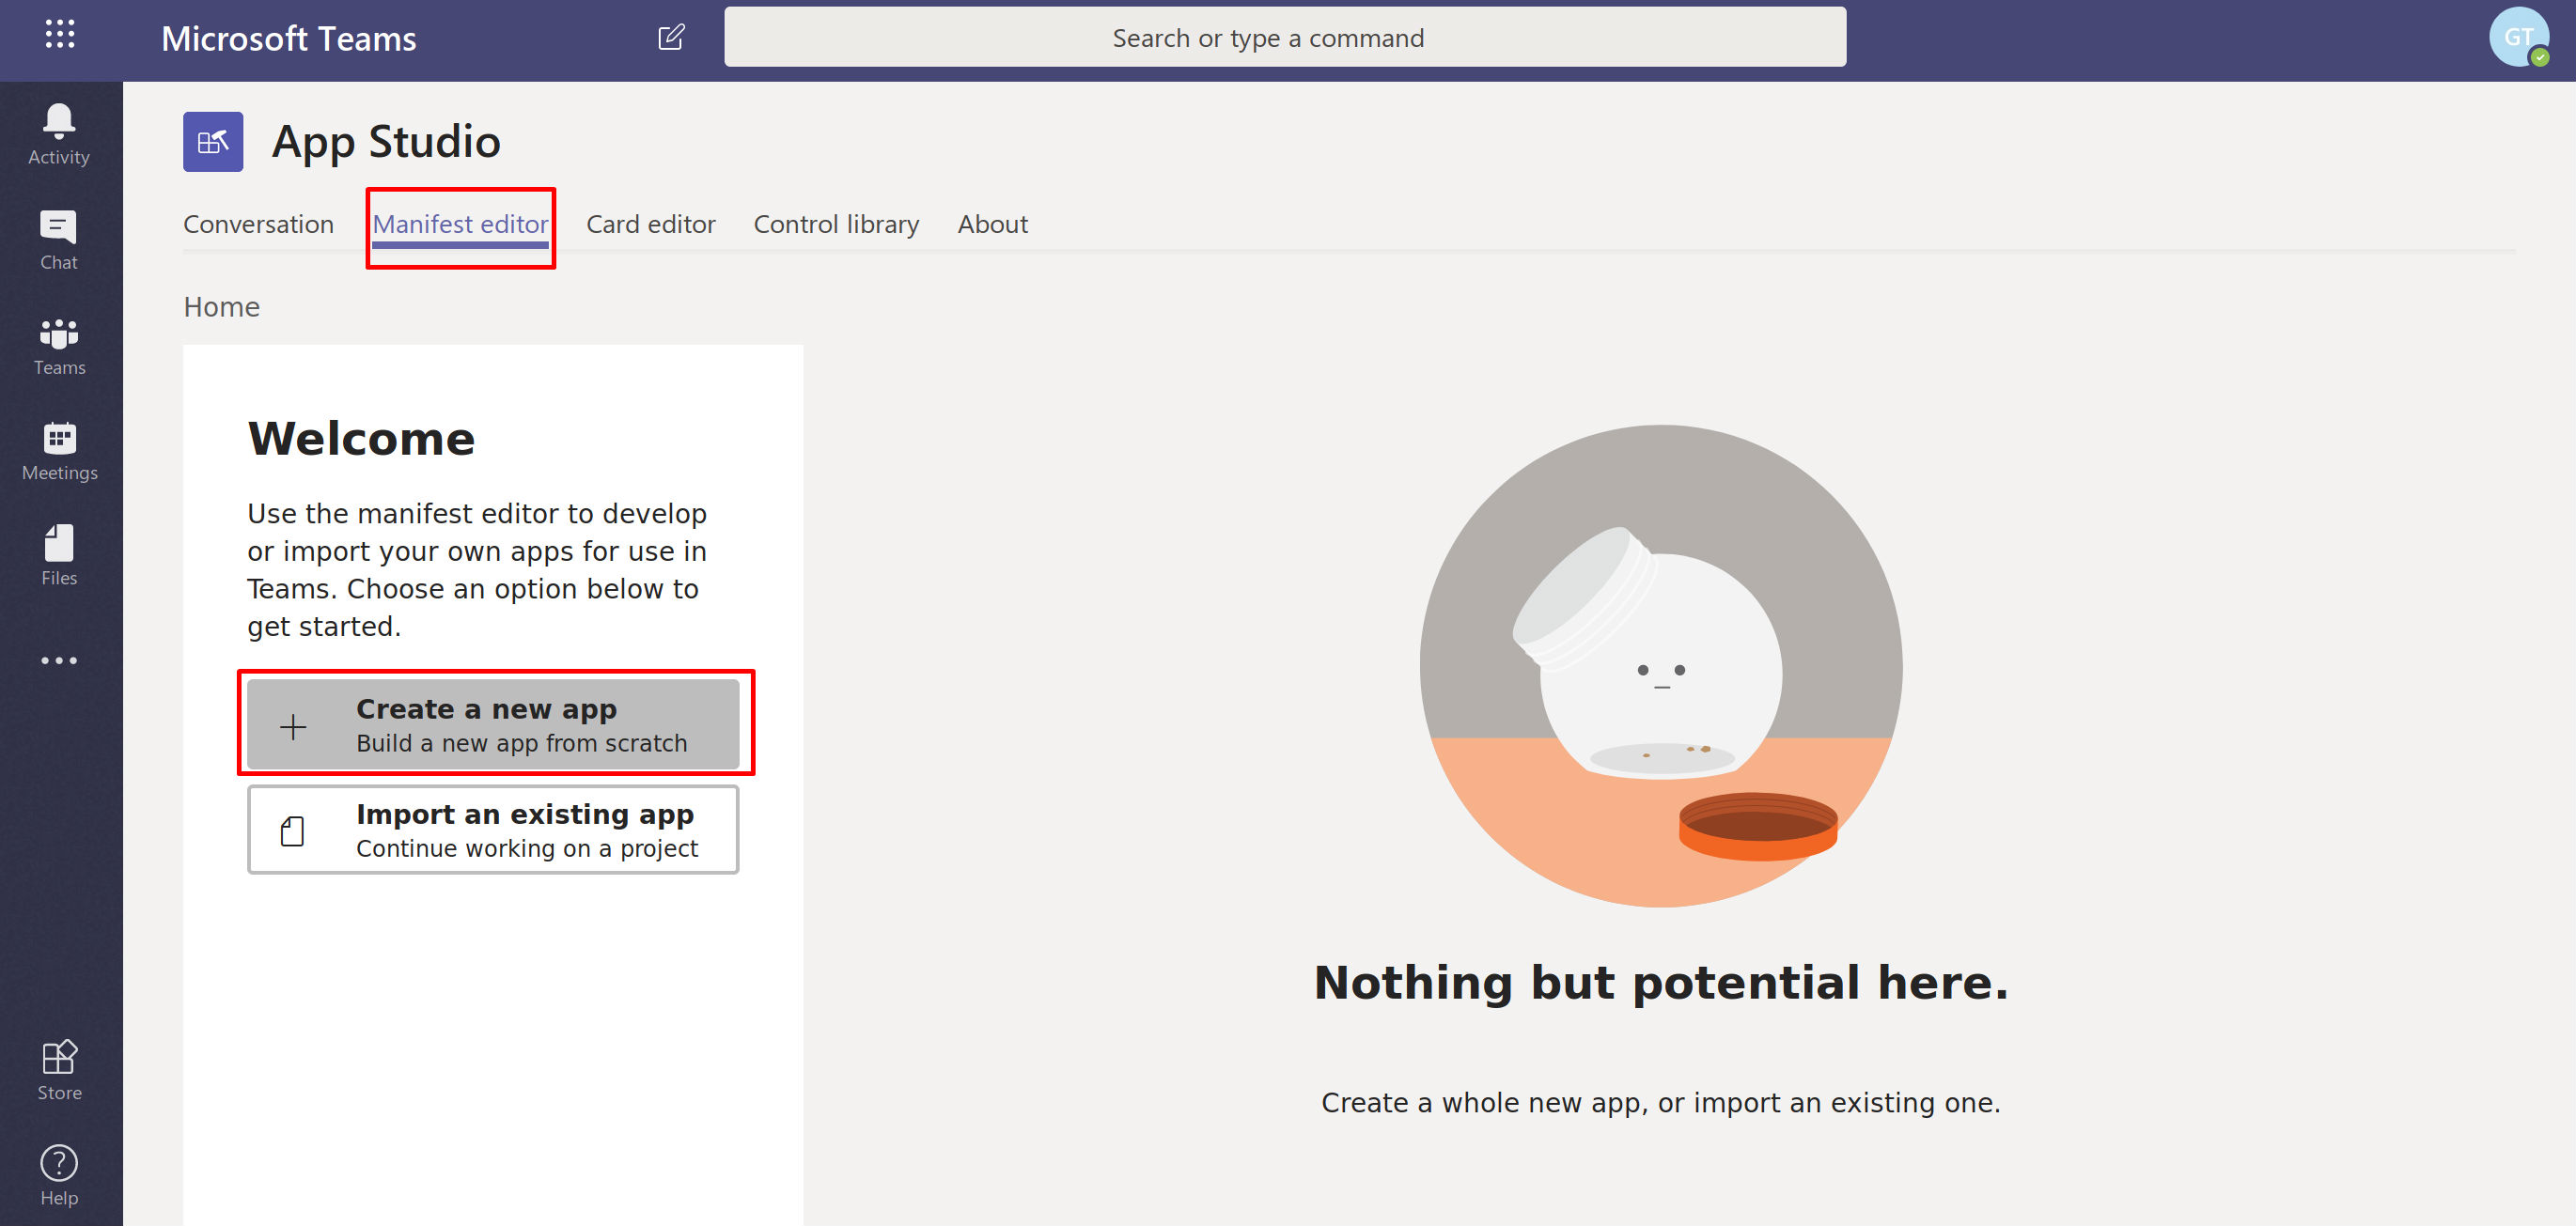
App Studio will create a brand new, customizable app manifest for you.
Generate an App ID, Bot ID, and Bot Password
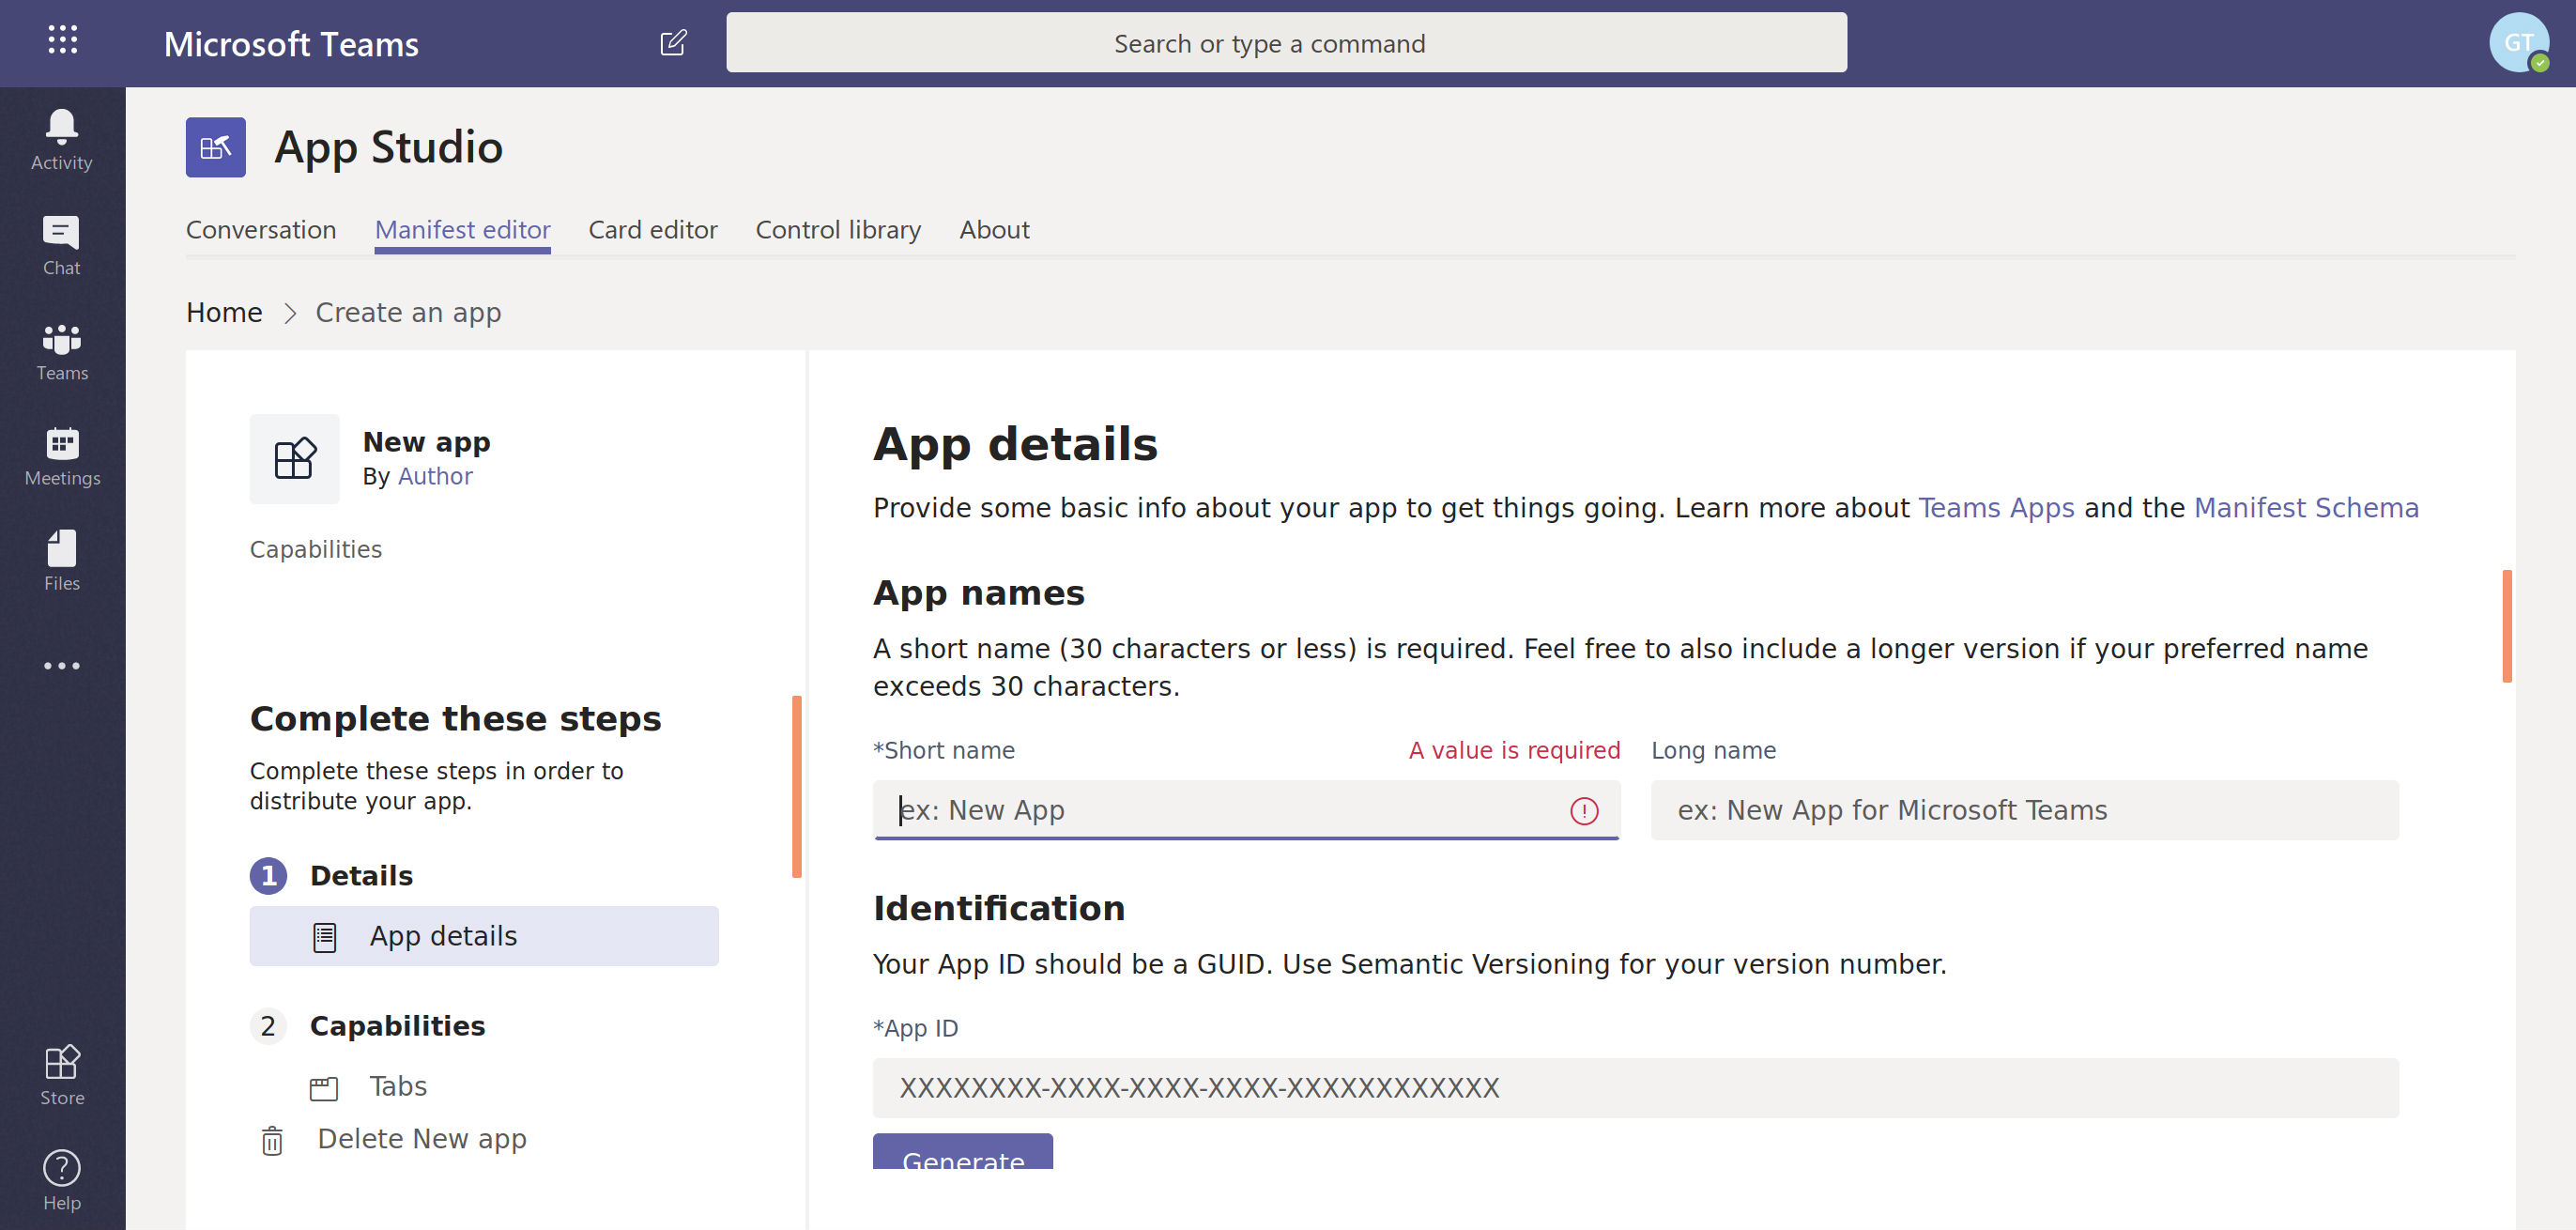
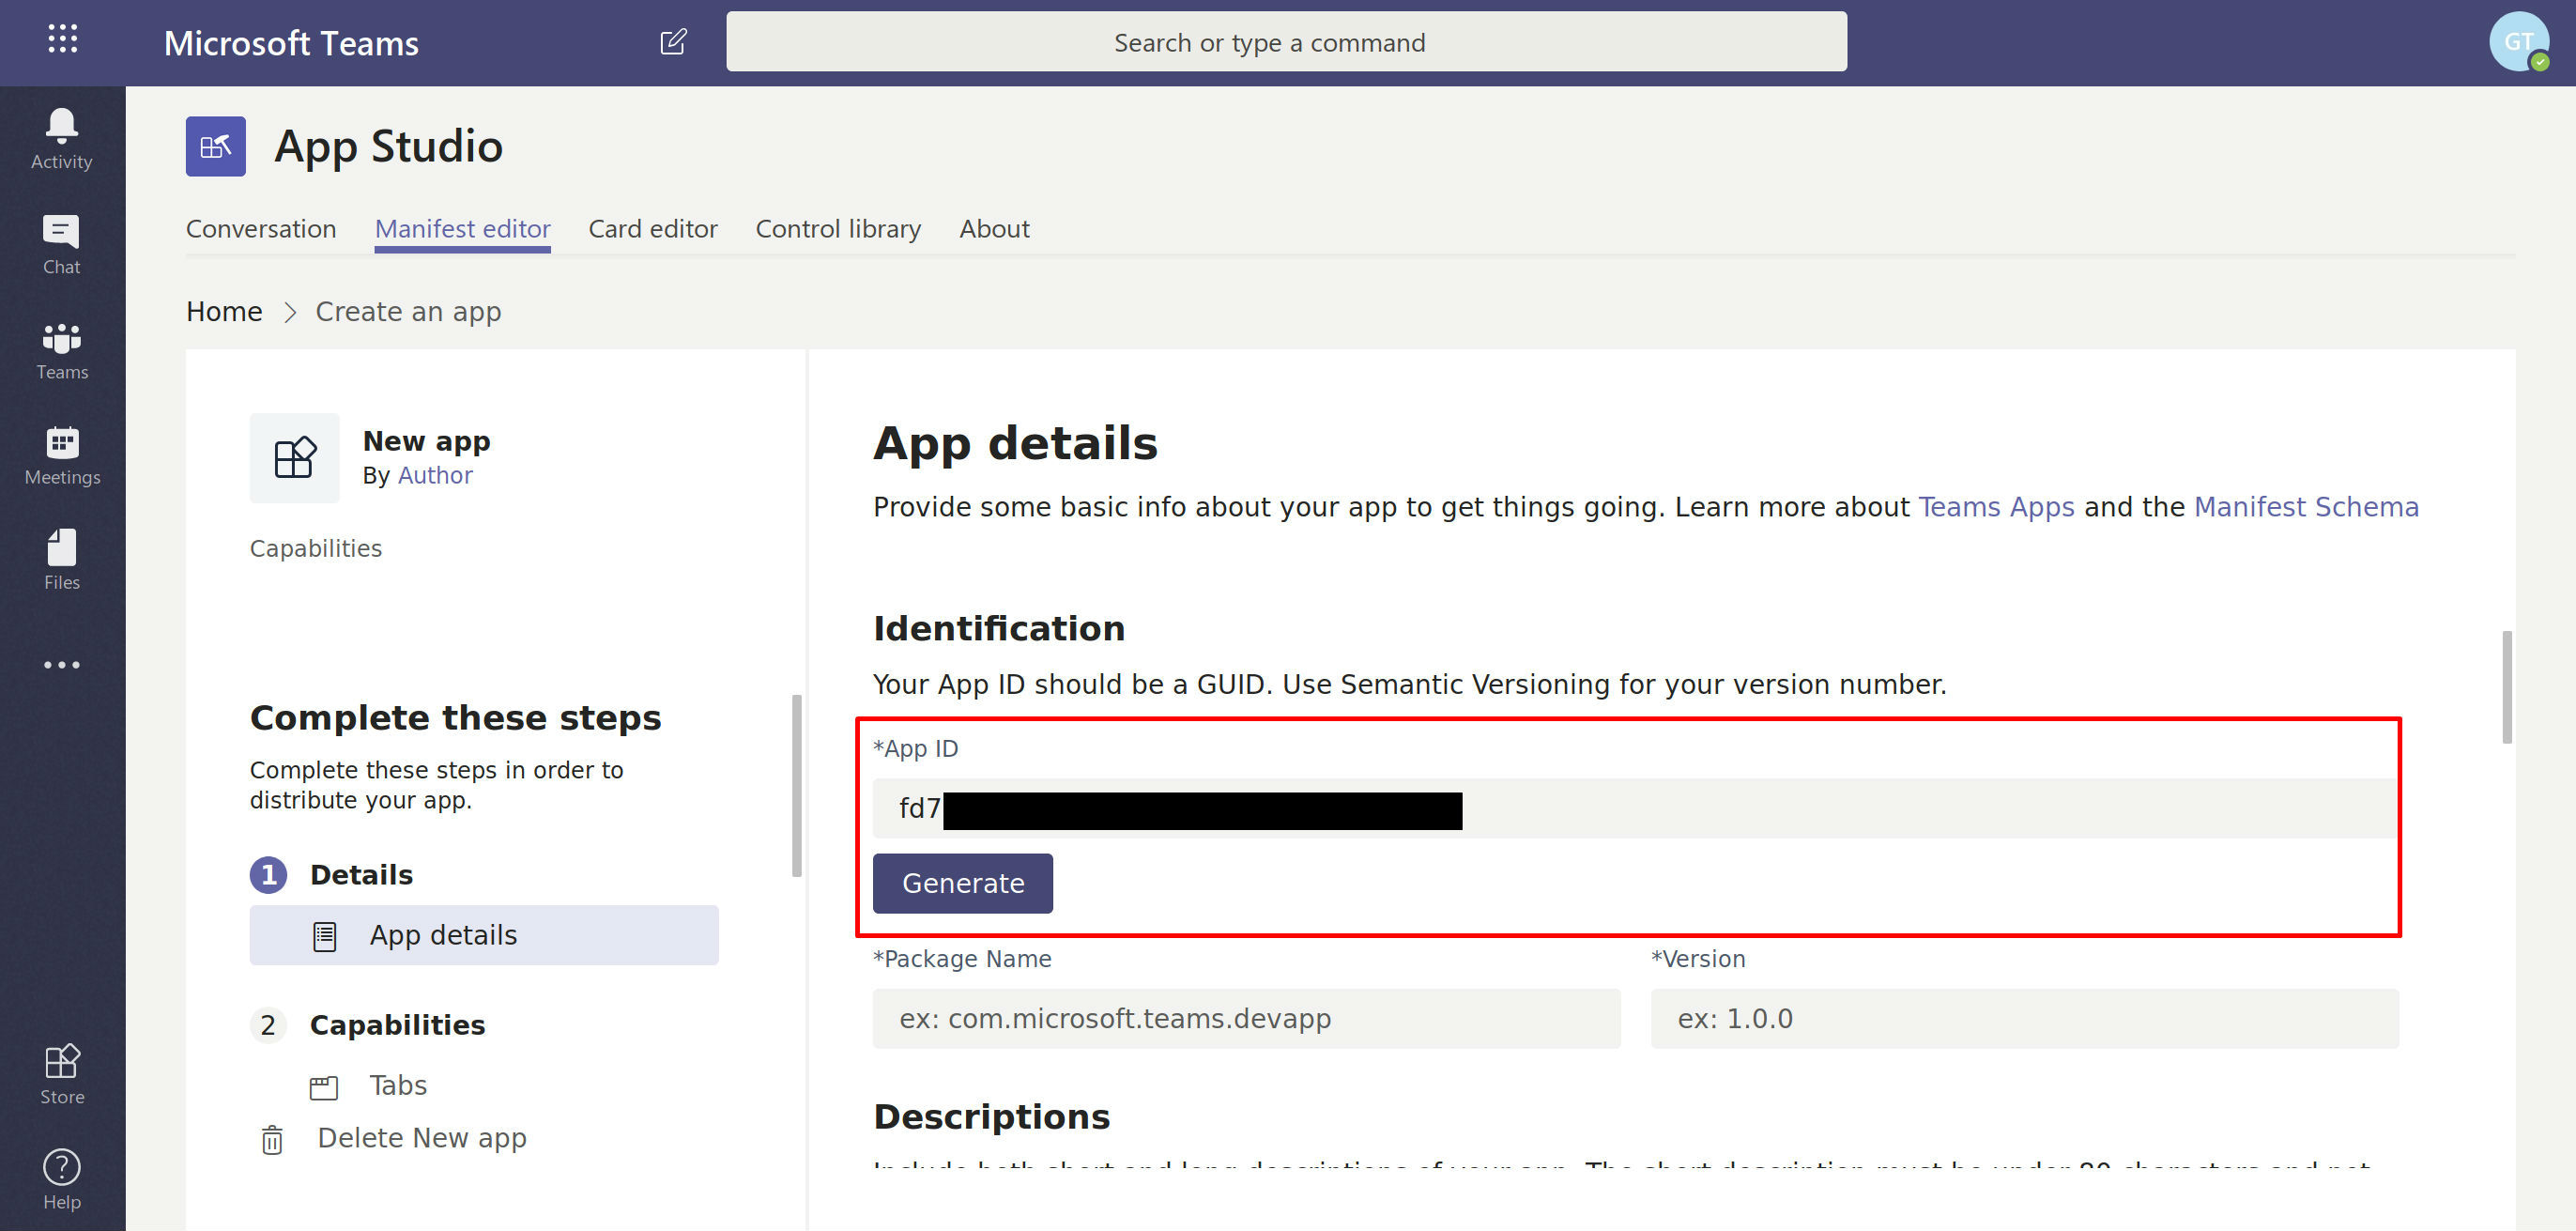
This is the really important part. (More on that later) Go to Details->App details->Identification and generate your App ID. Save the generated ID.
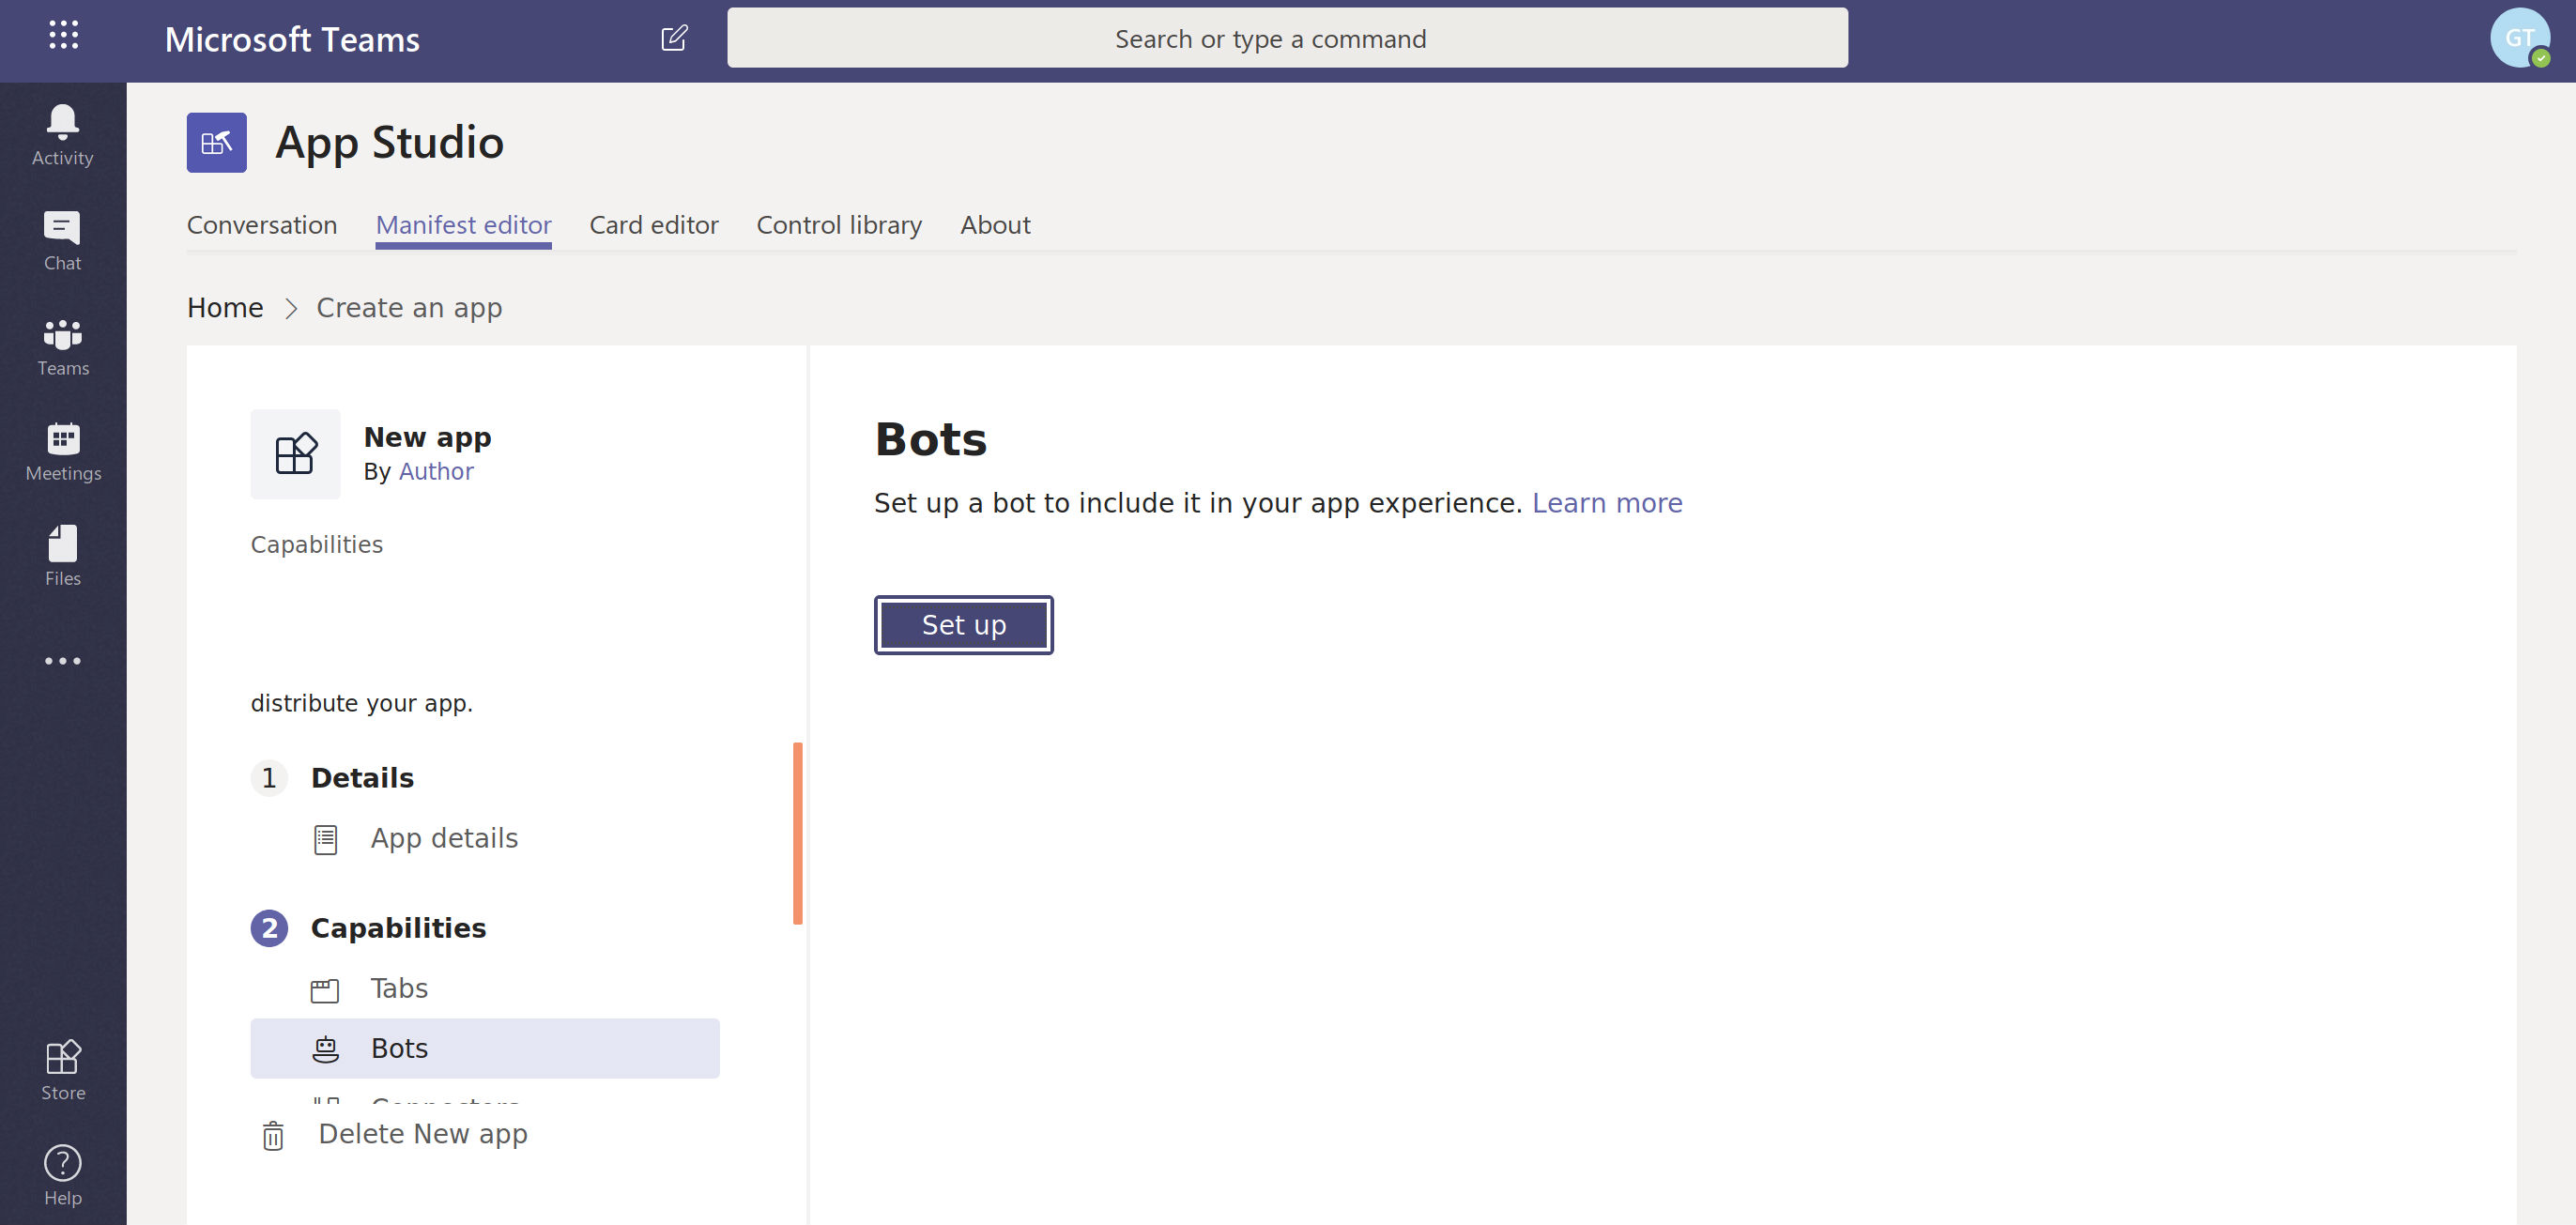
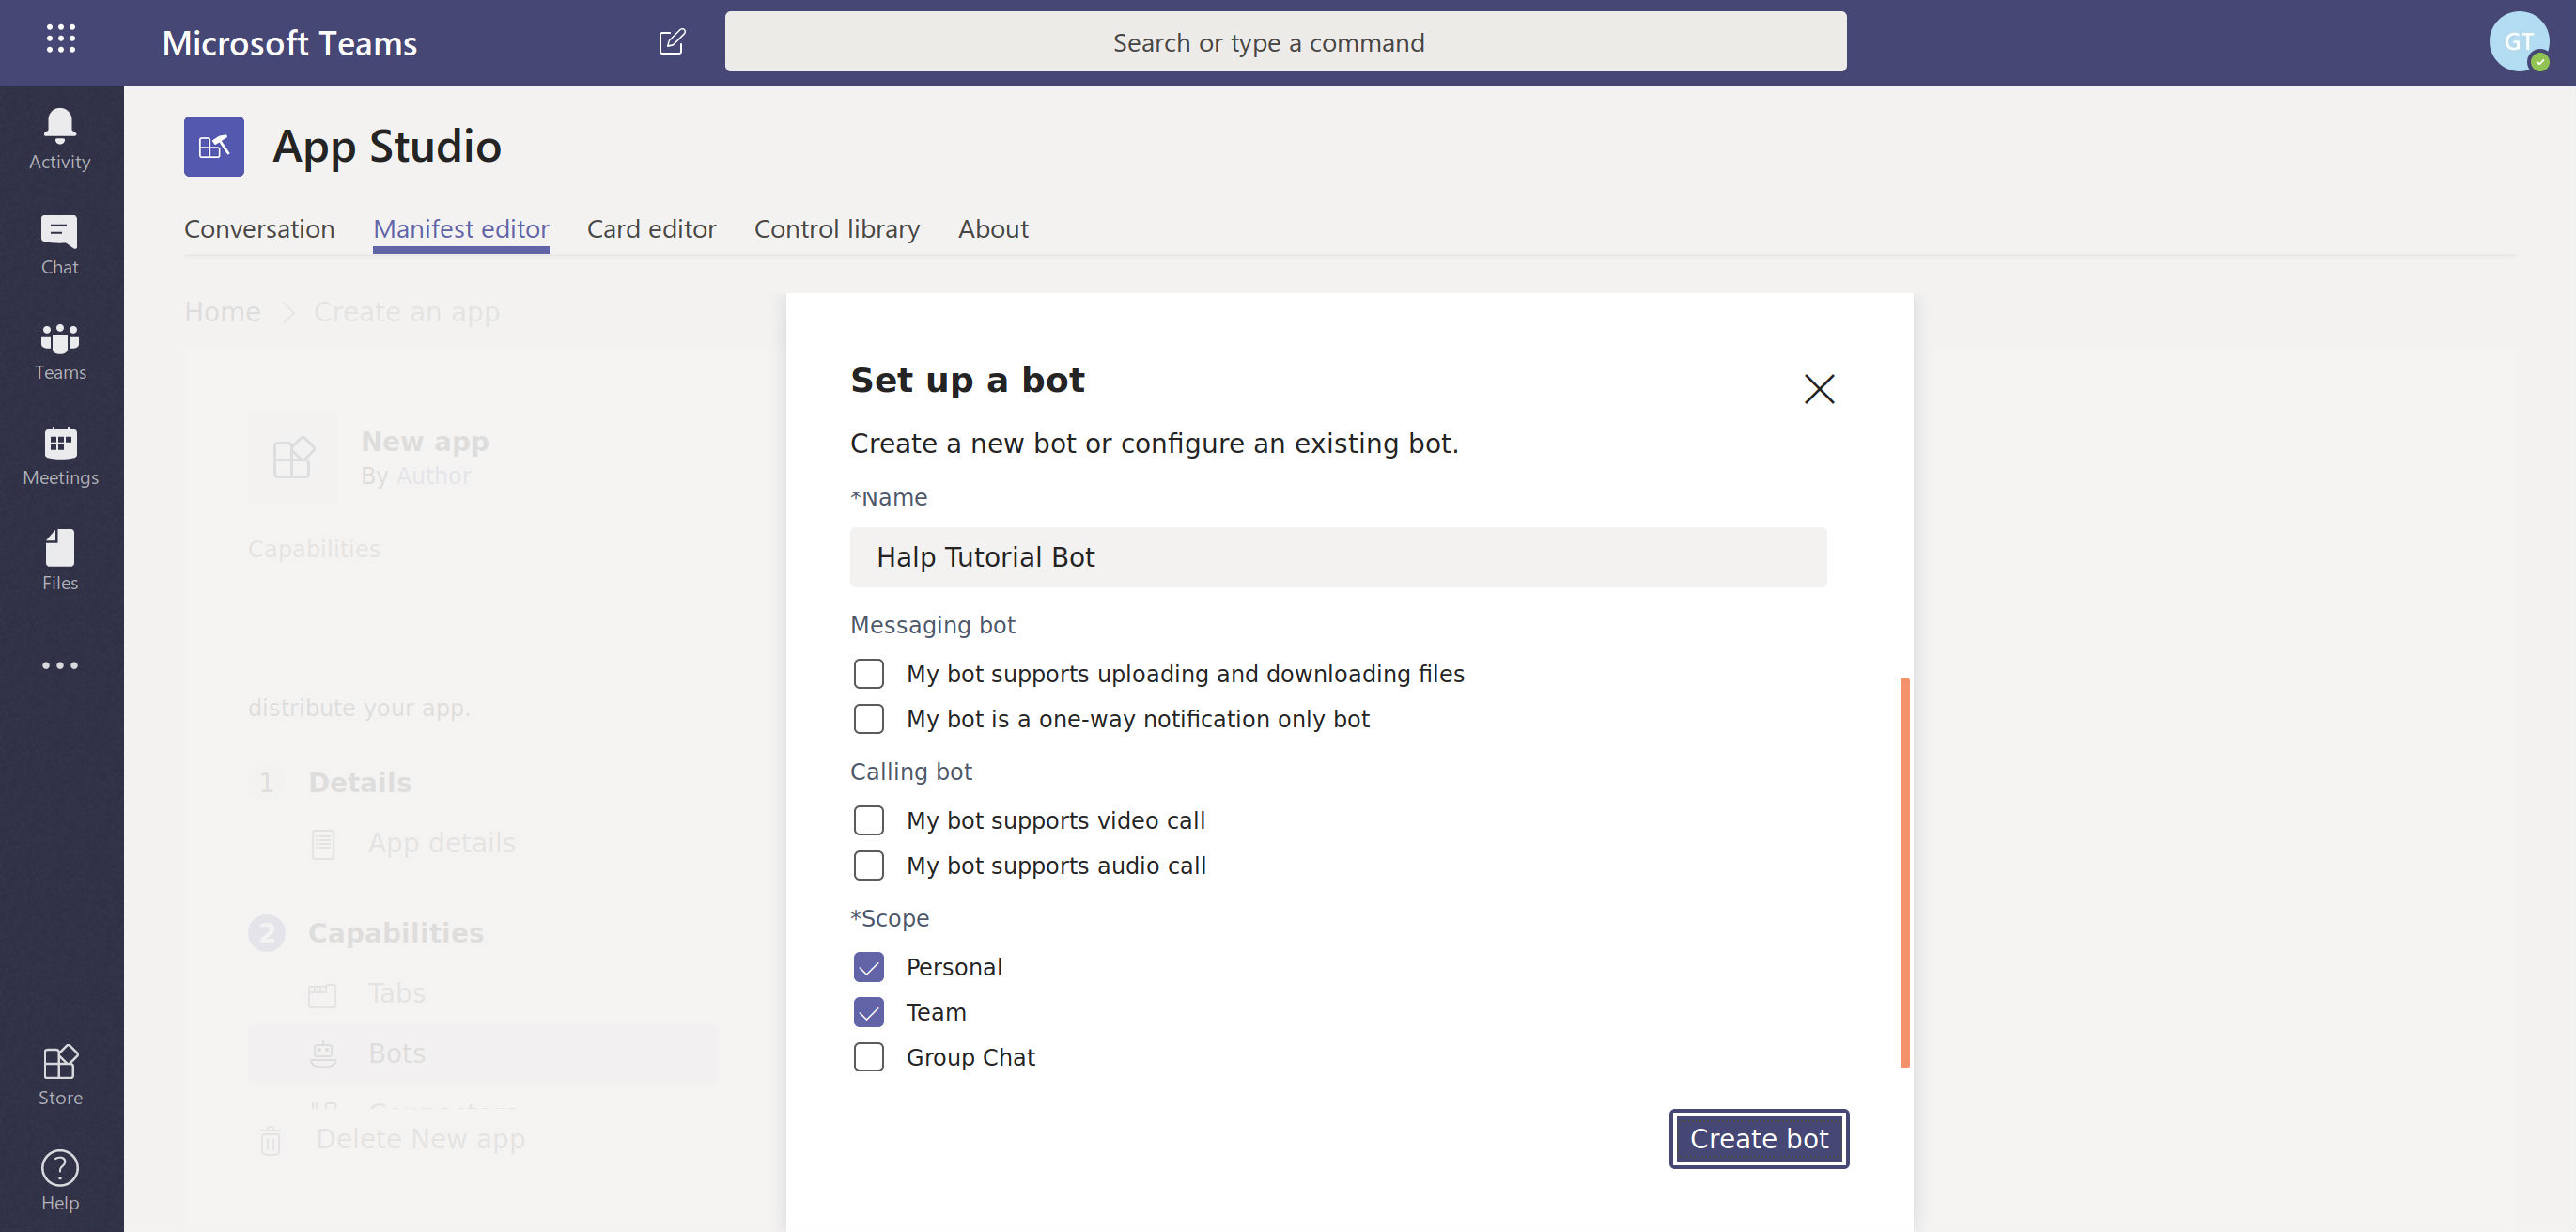
Next, go to Capabilities->Bots->Set up->New bot and fill out the information for your bot. Remember to set the scope of your bot. This will depend on where you want your bot to be available (in my case, “Personal” and “Team”).
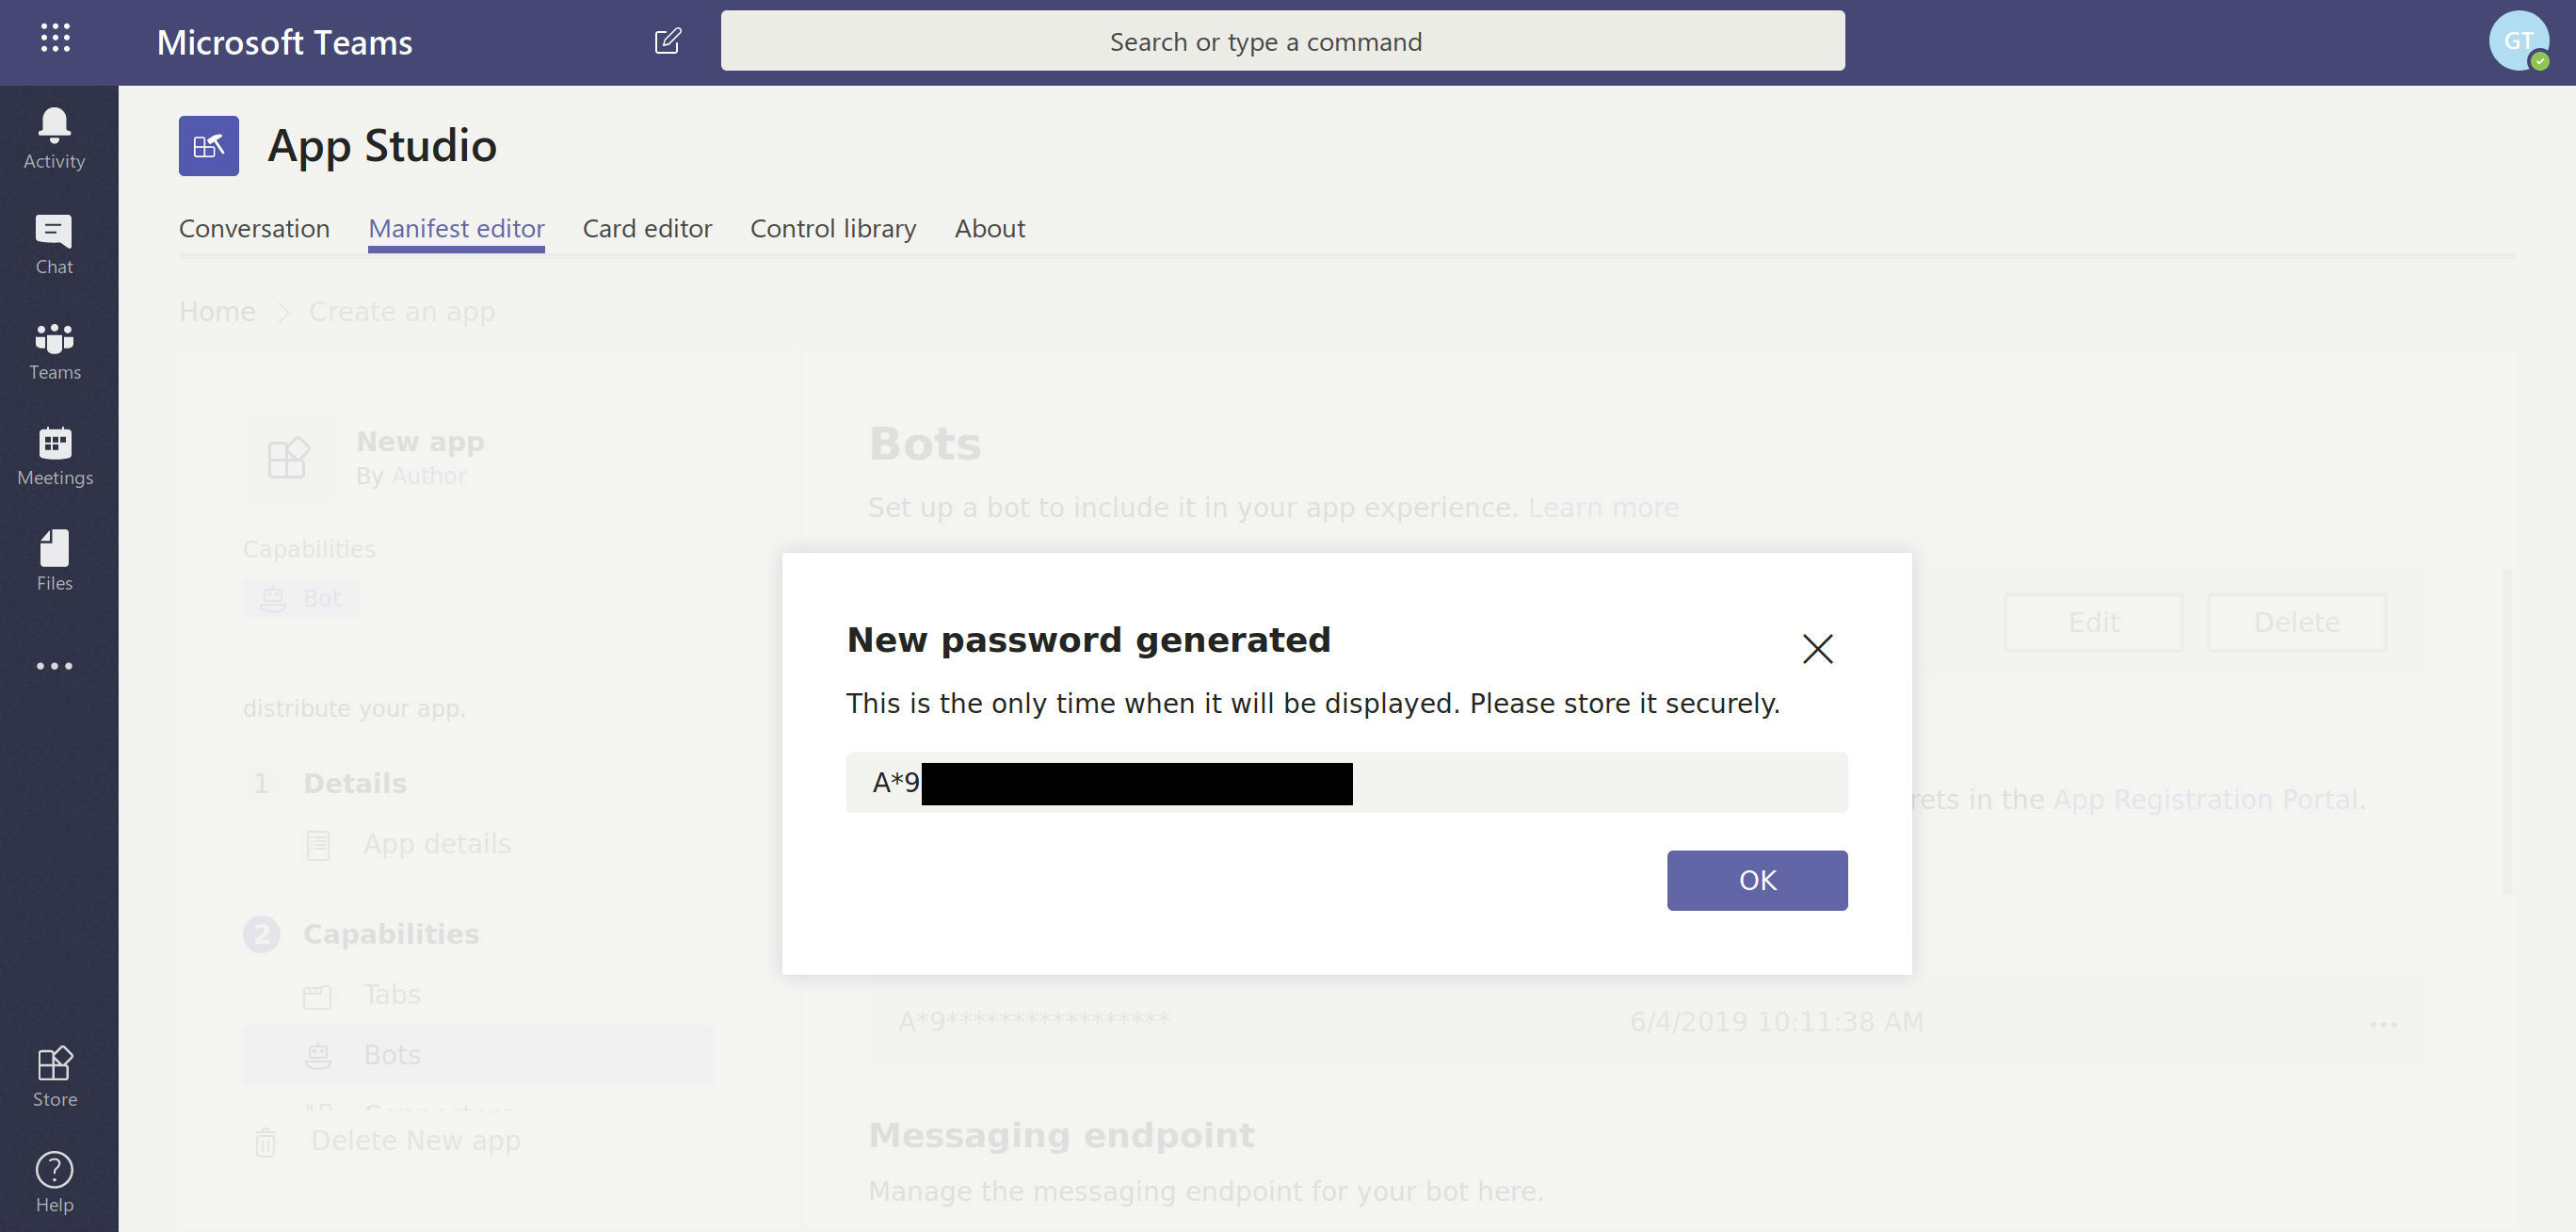
Once you create the bot, you’ll be able to retrieve its Bot ID and generate a Bot Password. Save these values!
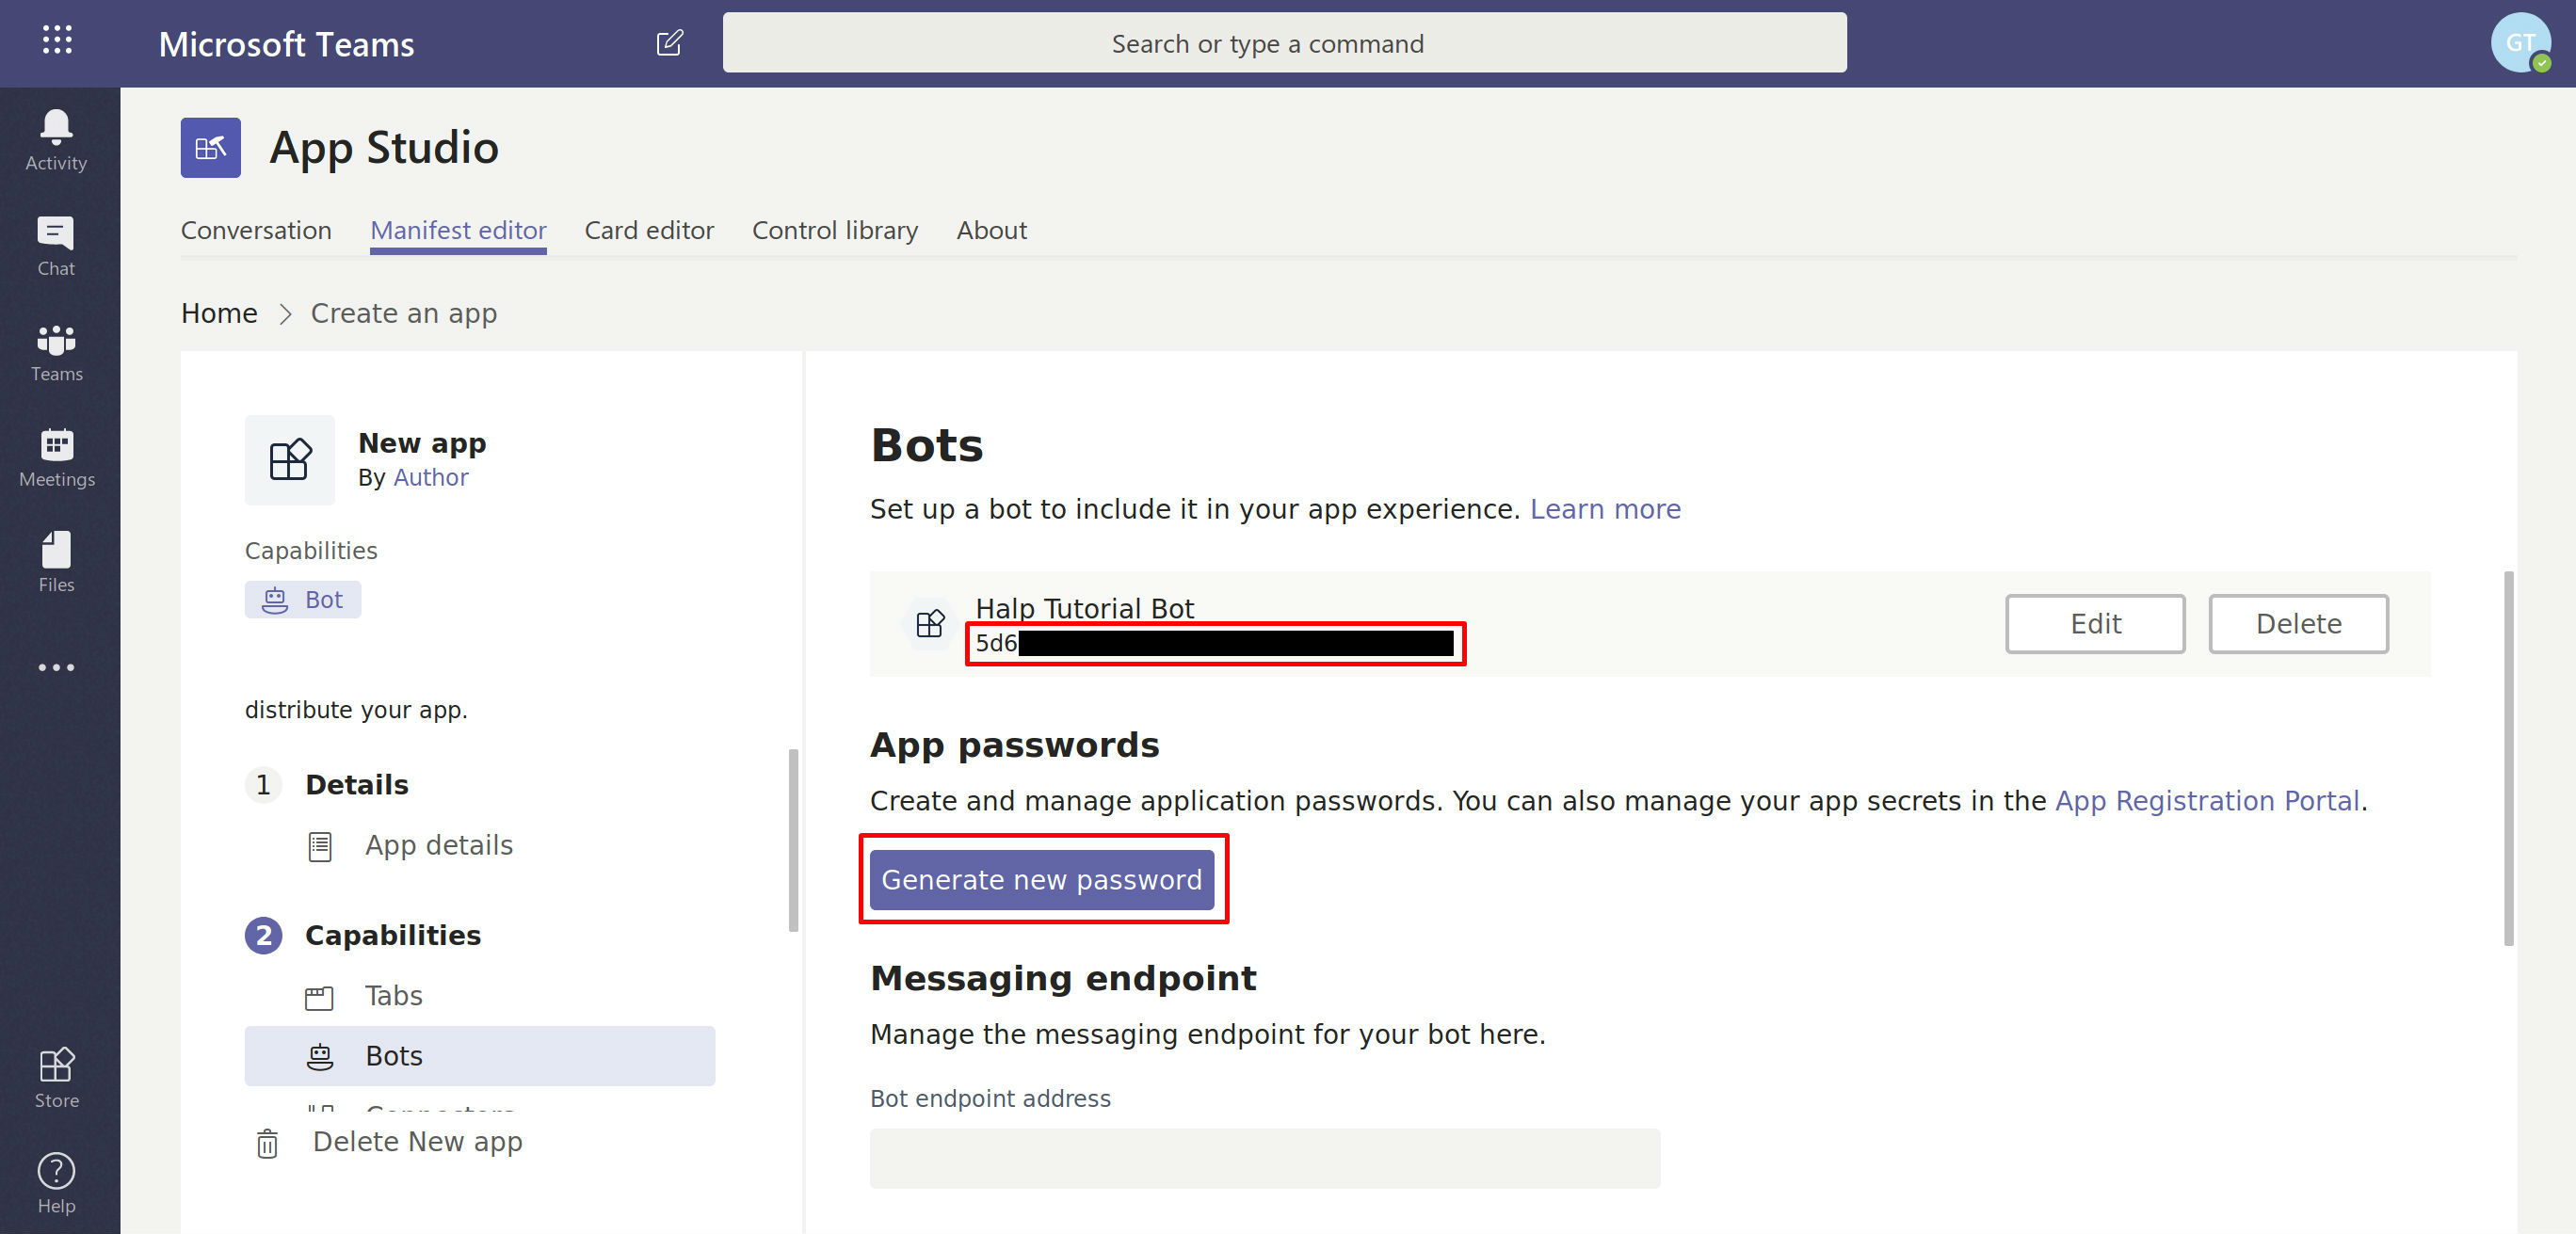
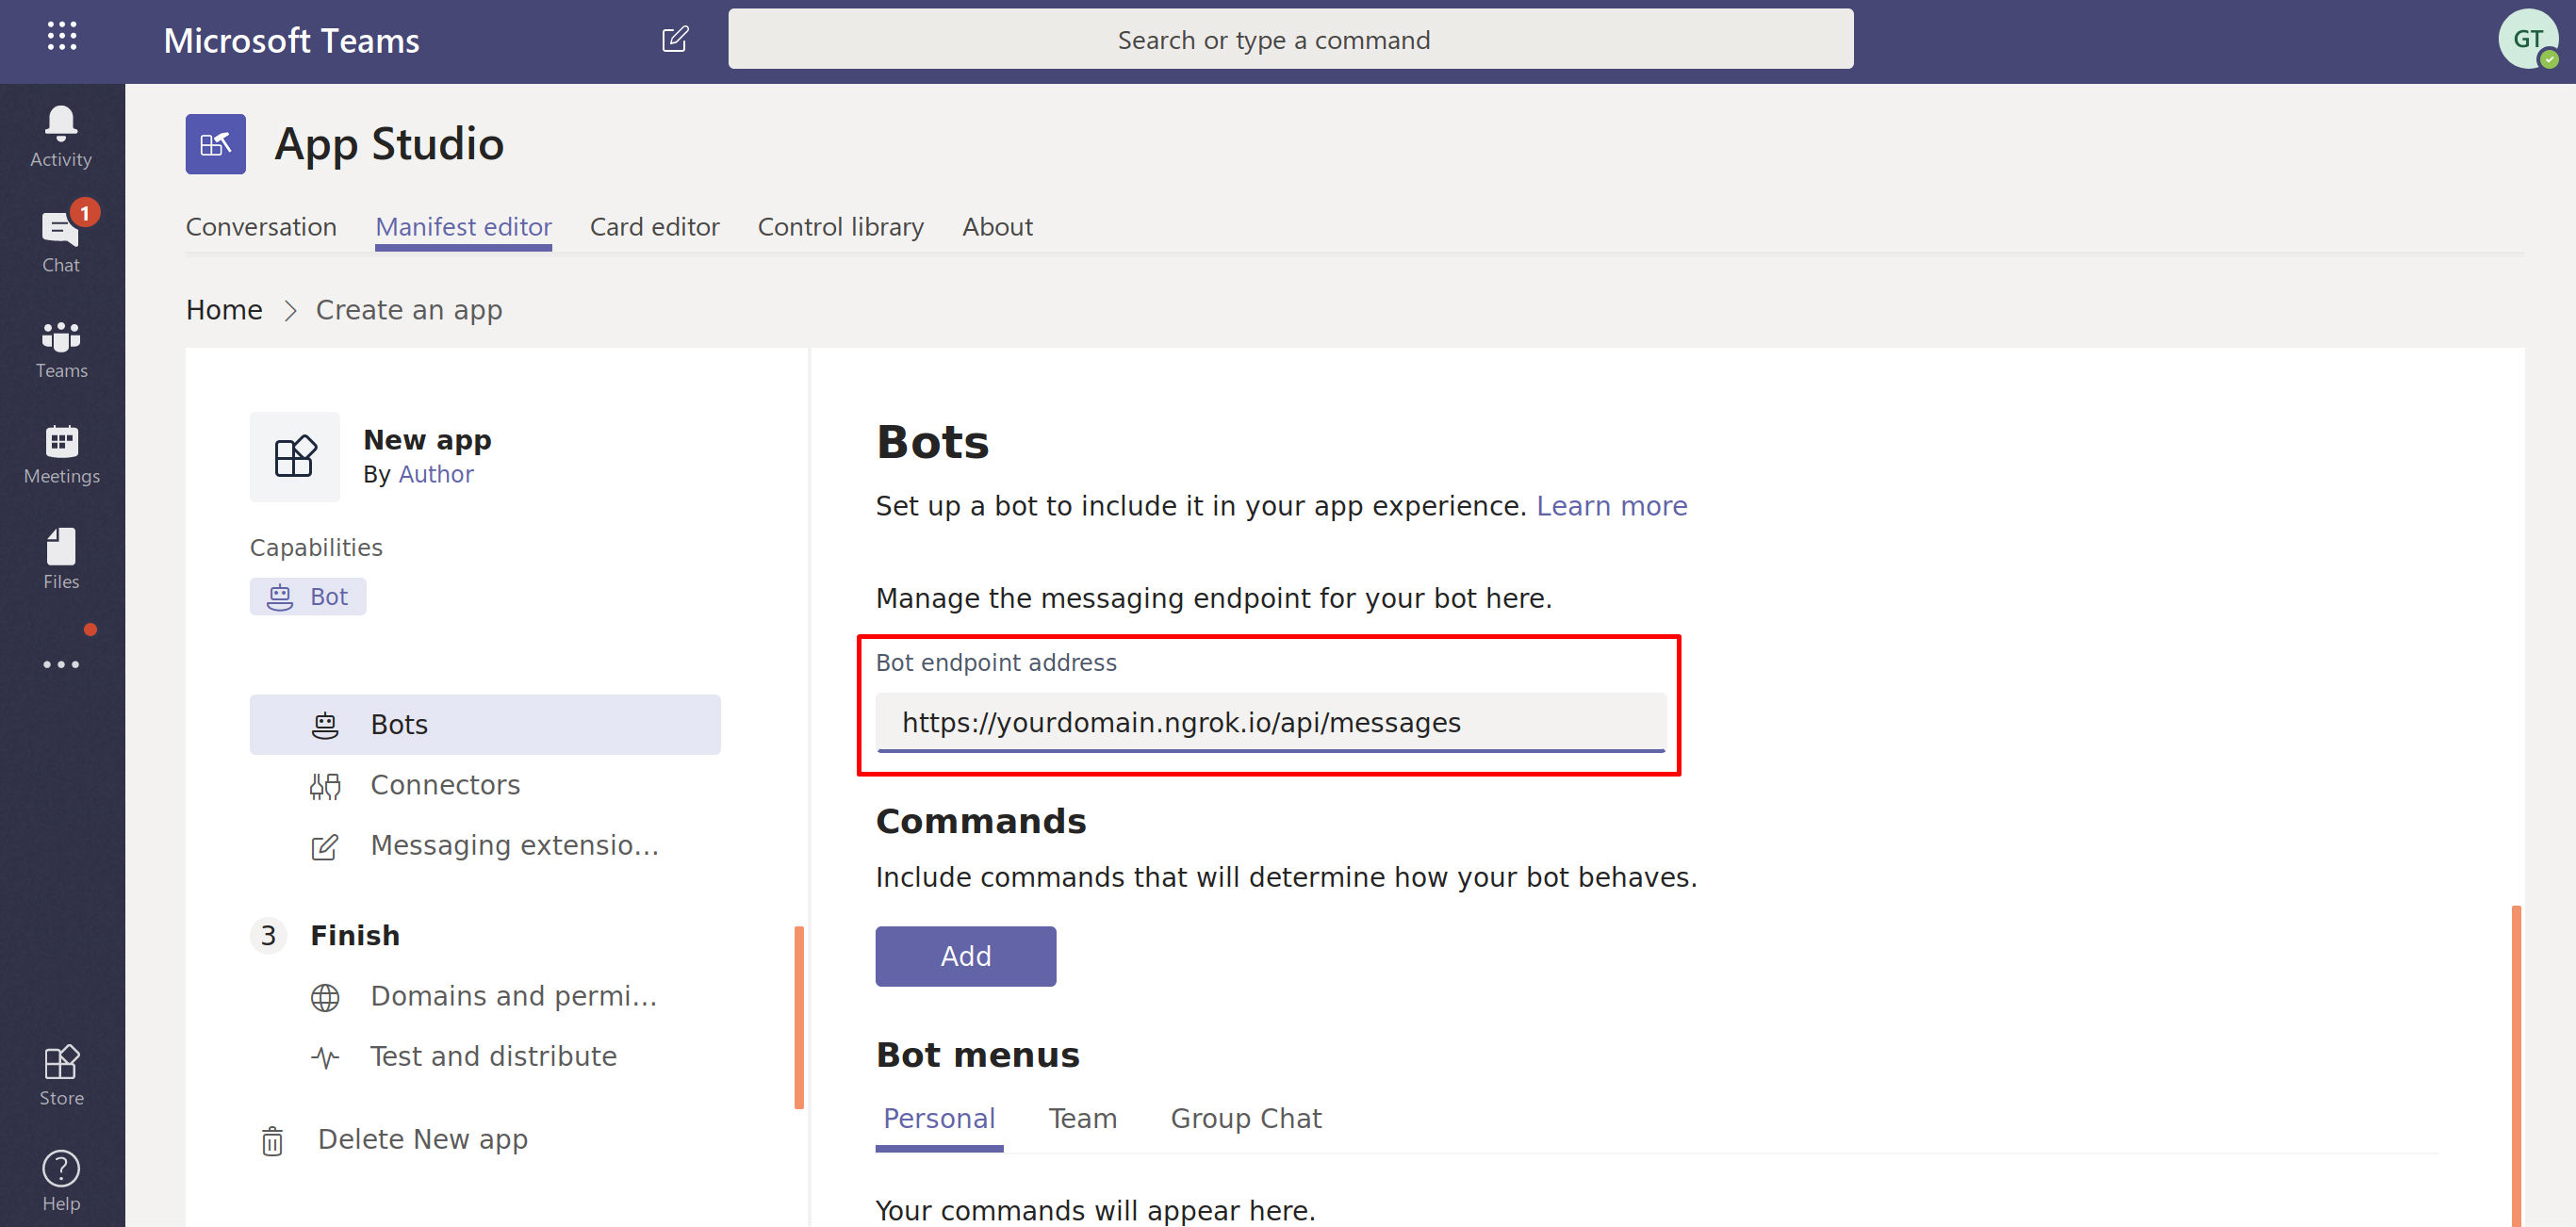
You will also need to set your bot messaging endpoint/bot endpoint address. This is the endpoint your bot will listen to events from. You will use this value in your code.
By now, you should have four values to keep track of:
- App ID (I use this for deeplinking)
- Bot ID (I use this for bot commands and messaging extensions)
- Bot Password (Used with Bot ID)
- Bot messaging endpoint
These are the values you will use to authorize your app to interact with Teams and any bots you may have created. Usually, you would specify these values via environment variables and call said variables in your code as necessary. Update applicable fields in App Studio
Chances are, you’ve noticed that you can customize lots of features inside App Studio. It’s simple, intuitive, and I recommend filling out as much as possible.
If App Studio has everything you need, great! Go to Finish->Test and Distribute->Install. You’re done! And if you ever need to tweak your manifest, just do it in App Studio.
However…
App Studio (at least at the time I’m writing this) doesn’t support all Teams’s nifty features. In fact, one of the features I implemented for Halp’s Teams integration couldn’t be created by tinkering in App Studio alone. I was trying to open Halp’s web app in a task module via a messaging extension. This would have allowed users to choose different ticket forms (ex: an HR ticket or IT ticket). In order to do this, I had to modify the manifest “type” item - and there was no field available for this
If this sounds like you, you might want to sideload your custom app - and the rest of this guide will show you how. Download zip package from App Studio Go to Finish->Test and distribute->Download to download your new app’s zip package. The zip should contain:
- Your app’s manifest.json file
- Any icon images your app uses
Edit your manifest.json
Once you unzip your app’s zip file, you’ll be able to make any necessary changes in accordance with Microsoft’s schema for Teams.
Here’s an example manifest. Yours will be different. Note: I am using the same bot for messaging extensions and bot commands.
Uploading Your App
Zip images and manifest.json
Once you’re done making changes, zip up your manifest.json and any app images you need. The name of the file is arbitrary.
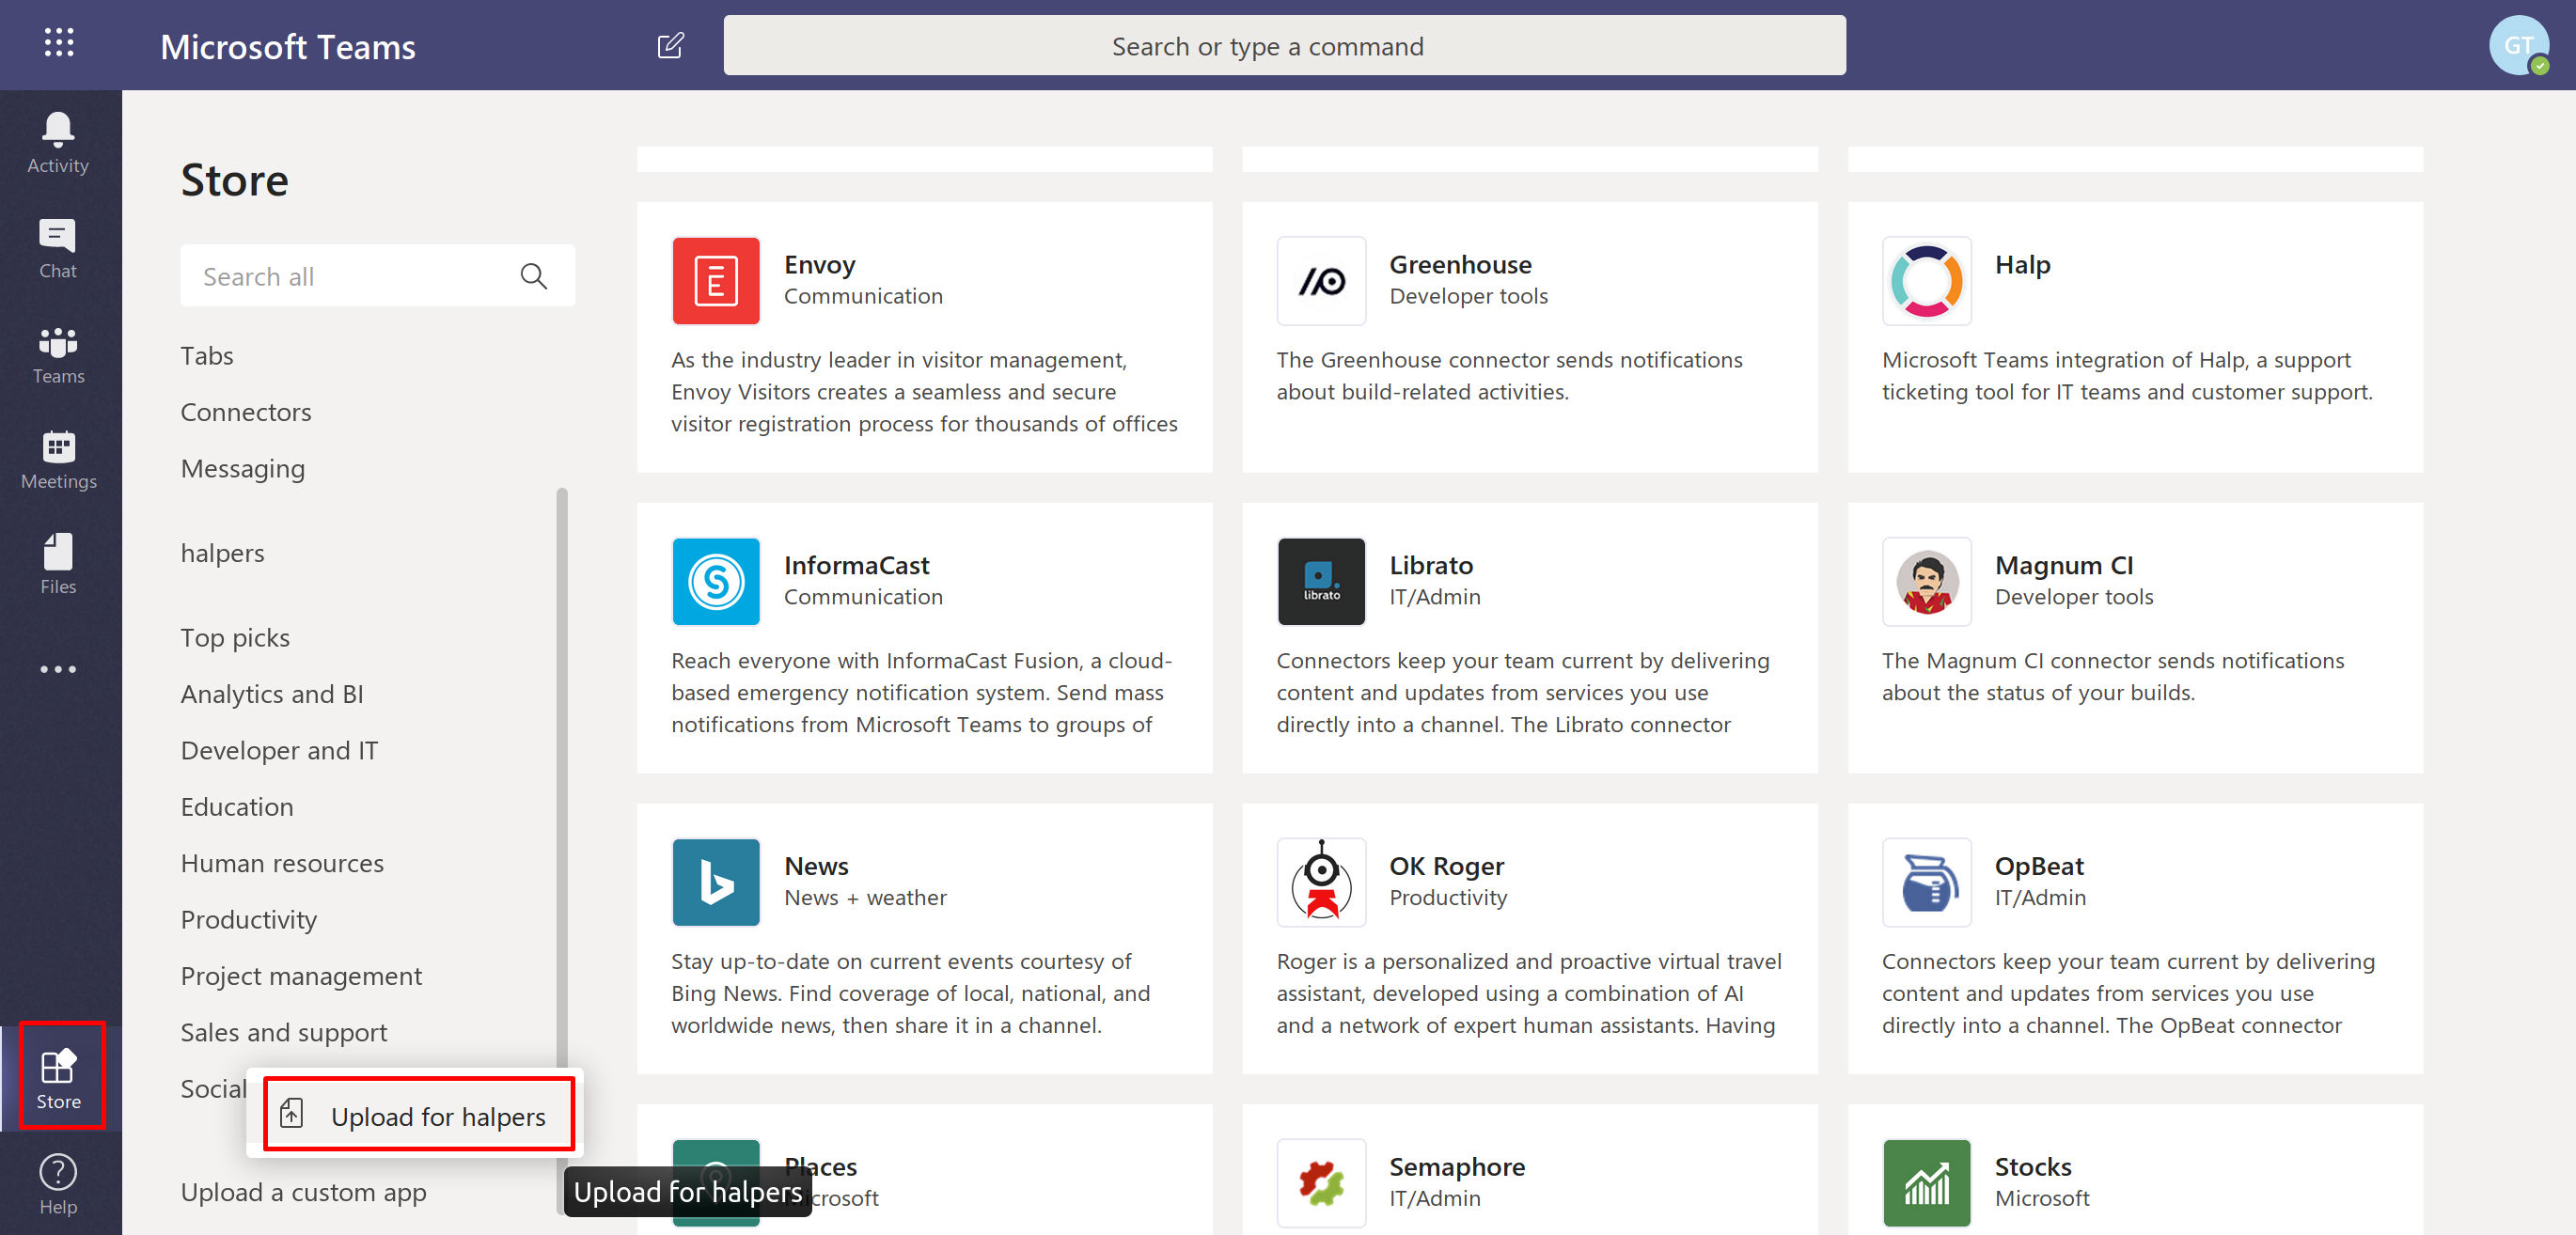
Upload zip file to a Team via Store
Near the bottom of the Store, there’s a link to “Upload a custom app”. You may need to scroll down along the left store menu. Select the organization you’re installing the app for. You’ll be prompted to upload your app’s zip file.
Almost there!
You will be brought to a dialog that asks you to install your app. Select the Teams(s) you want to add the app to and install!
Updating Your App (Sideloading)
Change version number and rezip package
In order to update you app, you must change your version number. (Ex: 1.0.0 to 1.0.1) Rezip your updated package.
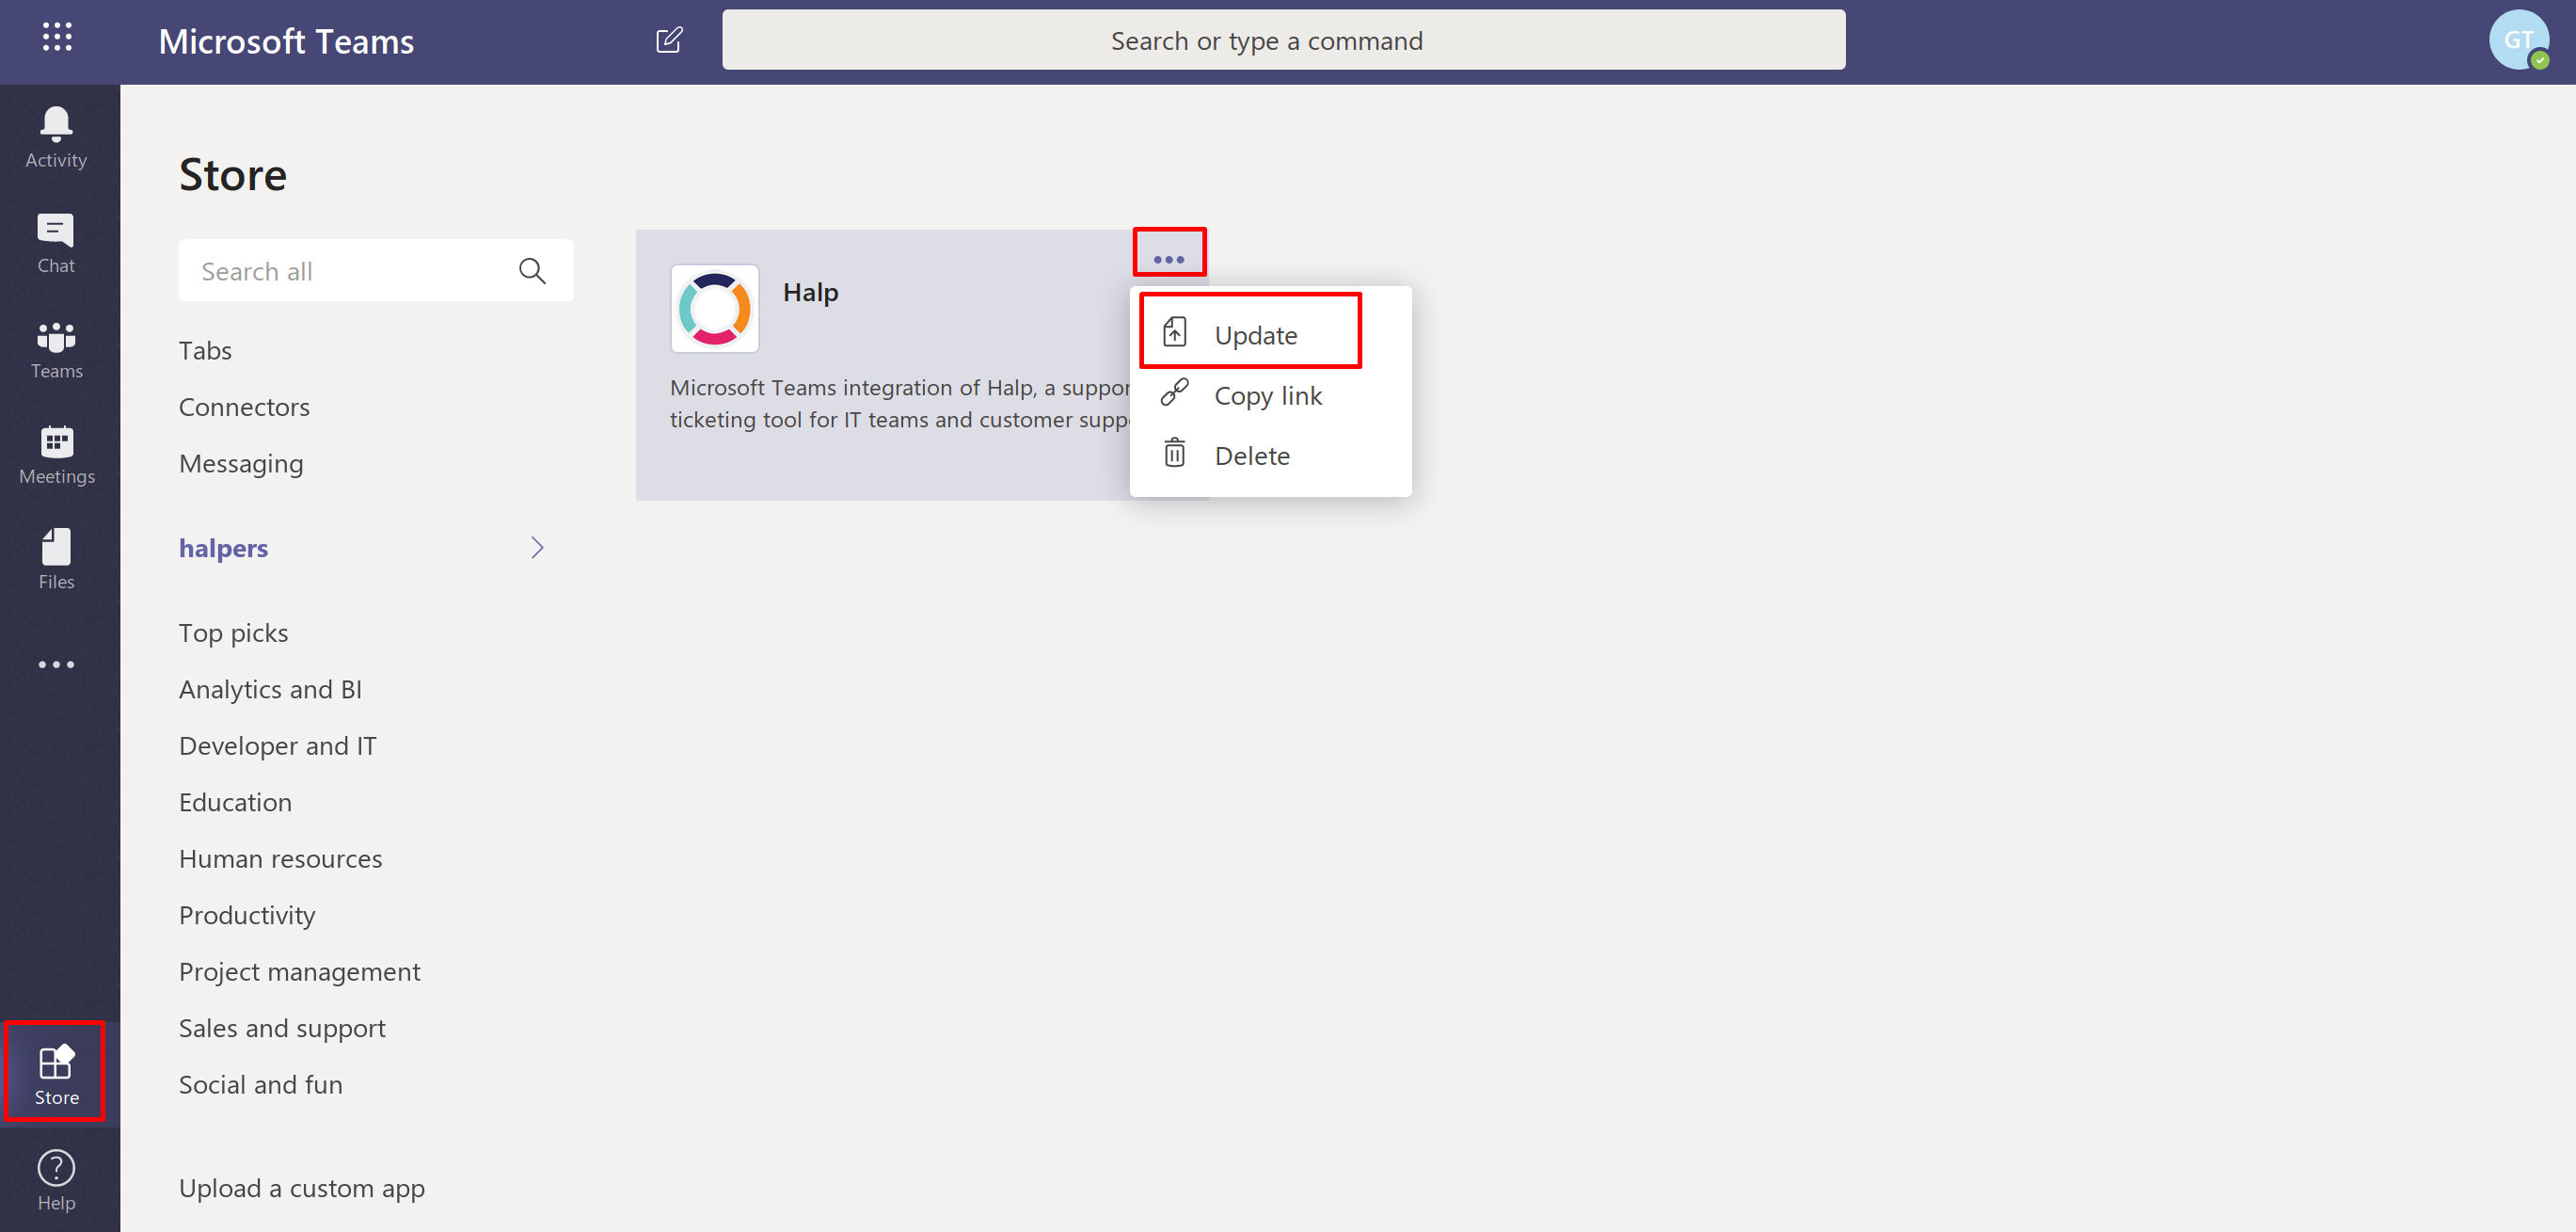
Update via Store
Somewhere on the left store menu, there’s a named after your organization. Clicking it will bring you to a list of all your apps. If you click the ellipsis icon at the corner of your app, you’ll see the option to update your app.
Once you select your updated zip file, you’re done!
Summary
- Create an app in App Studio
- Generate and save your App ID, a Bot ID, and a Bot Password
- Download your app zip package from App Studio
- Unzip the package and modify images and the manifest.json
- Upload your custom app to Store via sideloading
- Party!
I hope you found this post helpful! We’re using this same, basic process for developing Halp’s own Microsoft Teams integration. If you’re interested in a support-ticketing app for Microsoft Teams, have a look at our work and book a demo. We’ll be releasing updates and findings as we continue to build, so stay tuned for more Teams tips, tricks, and tutorials!